


 Christmas


✨ Build your dream setup!
×


How to Watermark Photos in Canva: Quick & Easy Guide for Beginners

Nowadays, more and more photographers and creators want to design and share images to build their brand. The competition out there is pretty crazy.
Watermarks are absolutely necessary when wanting to establish a brand and present your work more professionally. And you know what? Canva is a great design tool, especially for beginners just starting out. So it’s definitely worth using for your watermarks. And if you’re wondering why watermarks are so useful, you’re surely in the right place. Let us explain!
Beginner photographers want to protect their photos while still maintaining a professional look - and they are absolutely right, may we add. However, sometimes it can be tricky to understand how to include watermarks in a way that feels both low-key (that I see you, I don’t see you effect) and beautifully elegant and personalized all at once.
Yet, that’s why we’re here! We’ve put together this guide to help you add both text and image watermarks in Canva. No more intrusive and weird-looking watermarks after reading this. Yep, guaranteed!
Adding a Text Watermark to Your Photos Made Easy
How to even begin? So, let’s take it bit by bit and start with how to add a text watermark to your professional shots. Let’s get into it.
Step 1: Adding the Text Box & Typing the Watermark Text
Easy peasy way to add a text watermark? First thing, click the Text (T) tool on the left panel. Then select Add a text box. Finally, type your watermark text and drag it to your preferred spot on your pic.

Image from YouTube
Step 2: Customize the Watermark Text to Your Own Distinctive Style
How? Easy and important part! Select your text box and click the font dropdown in the toolbar at the top. Then choose a clear font for your watermark. It’s important that you carefully select a font that feels clean but also, and especially, aligns with your style. Some classy font examples include Canva Sans and Anton. Try them out!

Image from YouTube
Step 3: Now Make it Transparent for A Better Blending
Of course, the focus always needs to be on your professional shot. That’s why adjusting the watermark’s transparency is key. To do so, select the text and click the Transparency Icon (checkerboard symbol) on the top toolbar. Then drag the slider to adjust the opacity so the text still remains visible, while blending with your image in a natural way. You want to aim for that I see you, I don’t see you effect.

Image from YouTube
Step 4: Get Going With the Duplicate and Spread
The more, the better! It’s time to copy the watermark text and paste it - yes yes, multiple times. Display the text evenly across the image, covering all the photo areas you want to protect. Select all watermark layers and click Group to then lock them together.

Image from YouTube
Adding an Image Watermark to Your Photo
Were you thinking text watermarks are your only option? Of course not! You can choose to add image watermarks too. Stay with us a little longer. We’re about to guide you through this bit-by-bit process.
Step 1: Upload Your Logo Watermark
First off: Your image logo needs to be uploaded. So, go to Uploads on the left panel, and click Upload Files. Select your logo image, then drag the uploaded logo onto your photo. You simply need to adjust its size and voilà, first step’s done.

Image from YouTube
Step 2: Remove The Background from your Logo
You can easily select the image on Canva, then click BG Remover (Background Remover) from the top toolbar. It sounds too good to be true, but it’s not: Canva will remove the background automatically.

Image from YouTube
Step 3: Adjust Your Logo Style to Your Photo Style
You don’t want to have a logo that has nothing to do with the image, do you? So editing is always an important step. Click Edit at the top, open the Adjust panel and get crazy (no, not too much) with it, brightness, contrast, shades, you go for it.

Image from YouTube
Step 4: Time to Edit & Adjust your Image
Your image needs to align with your photo! Because you wouldn’t want to have something pop out that has nothing to do with the pic, right? So edit contrast, brightness and highlights to refine its look. Make sure the watermark stays visible across both the light and dark areas of your shot.

Image from YouTube
Step 5: Add Transparency to the Logo and You're Almost Done
You don’t want the logo to take center stage, right? So click the Transparency icon above your logo. Drag the slider down to lower the opacity, usually 20-40% will do. The aim is to make sure the watermark is readable while feeling truly subtle and not bothering the picture’s visibility. Remember that your photo is the main star.

Image from YouTube
Step 6: Resize & Position Your Logo Watermark as The Cherry on The Cake
Now it’s only about the last little details. Like, resizing the logo to a small size that fits your photo in an elegant and professional way. Center or corner usually are the best patterns.

Image from YouTube
How Can You Make Your Watermark Look Professional?
There’s a clear difference between a watermark that looks professional and one that doesn’t. But we’re about to explain how to make sure your watermark is one that looks like a real pro.
Aim for a Watermark That Feels Elegant and Not Distracting
Keeping opacity around 20–35% will definitely help your watermark merge with the pic rather than pop out weirdly. Yep, it’s a simple trick that makes a big difference, so the mark blends into the image and lets your photo shine. Also, make sure to use clean fonts or simple logos to avoid a too commercial look. Subtle branding always feels more pro, and you surely want to be pro, don’t you?
Place Your Watermark with Intention for a "Feels Good" Feel
The watermark position is as important as the watermark itself. Place it near the bottom corner with a small margin for a refined feel that feels good to the eye, and not all over the place. Avoid faces, bright highlights or key lines in the composition so it doesn’t interrupt the story of your shot.
Create Light and Dark Variations to Give a Harmonious Vibe
Make sure to prepare both a white and charcoal version so the watermark stays visible yet gentle on different backgrounds. You can always switch versions, depending on the image brightness so the image feels balanced and doesn’t give that too much feel. Hey, remember that consistency is excellent: Keep the same tone across your images so you can build a brand presence.
Save a Watermark Template for Fast Future Workflow
A tip that will ensure consistency across shots? Save your watermark with preset size, opacity and placement. Thank us later. Also, you can save time by creating separate horizontal and vertical templates so you don’t have to reposition the watermark again and again. And hey, using templates speeds up delivery and keeps your brand presentation impactful and professional.
Your professional watermark is waiting for you.
You’re finally ready to get started with your watermark! Congrats! Canva is such a great way for beginners to get going with the process. Remember that transparency, placement, and the minimal design choice are key for a great final result!
Frequently Asked Questions
How to watermark a photo on an iPhone?
Great news: You don’t necessarily need a laptop to add a watermark to your photo. You can download the Canva app on your iPhone and easily do it from there too. There are also other apps out there that can help you out. Such as eZy watermark photos lite, iWatermark, PhotoMarks.
Can I use my logo as a watermark?
Of course! Actually, it’s great to use your logo as it gives that extra personality and unique brand feeling. Use your logo as an image watermark and follow the steps described in this guide while uploading your own logo on Canva.
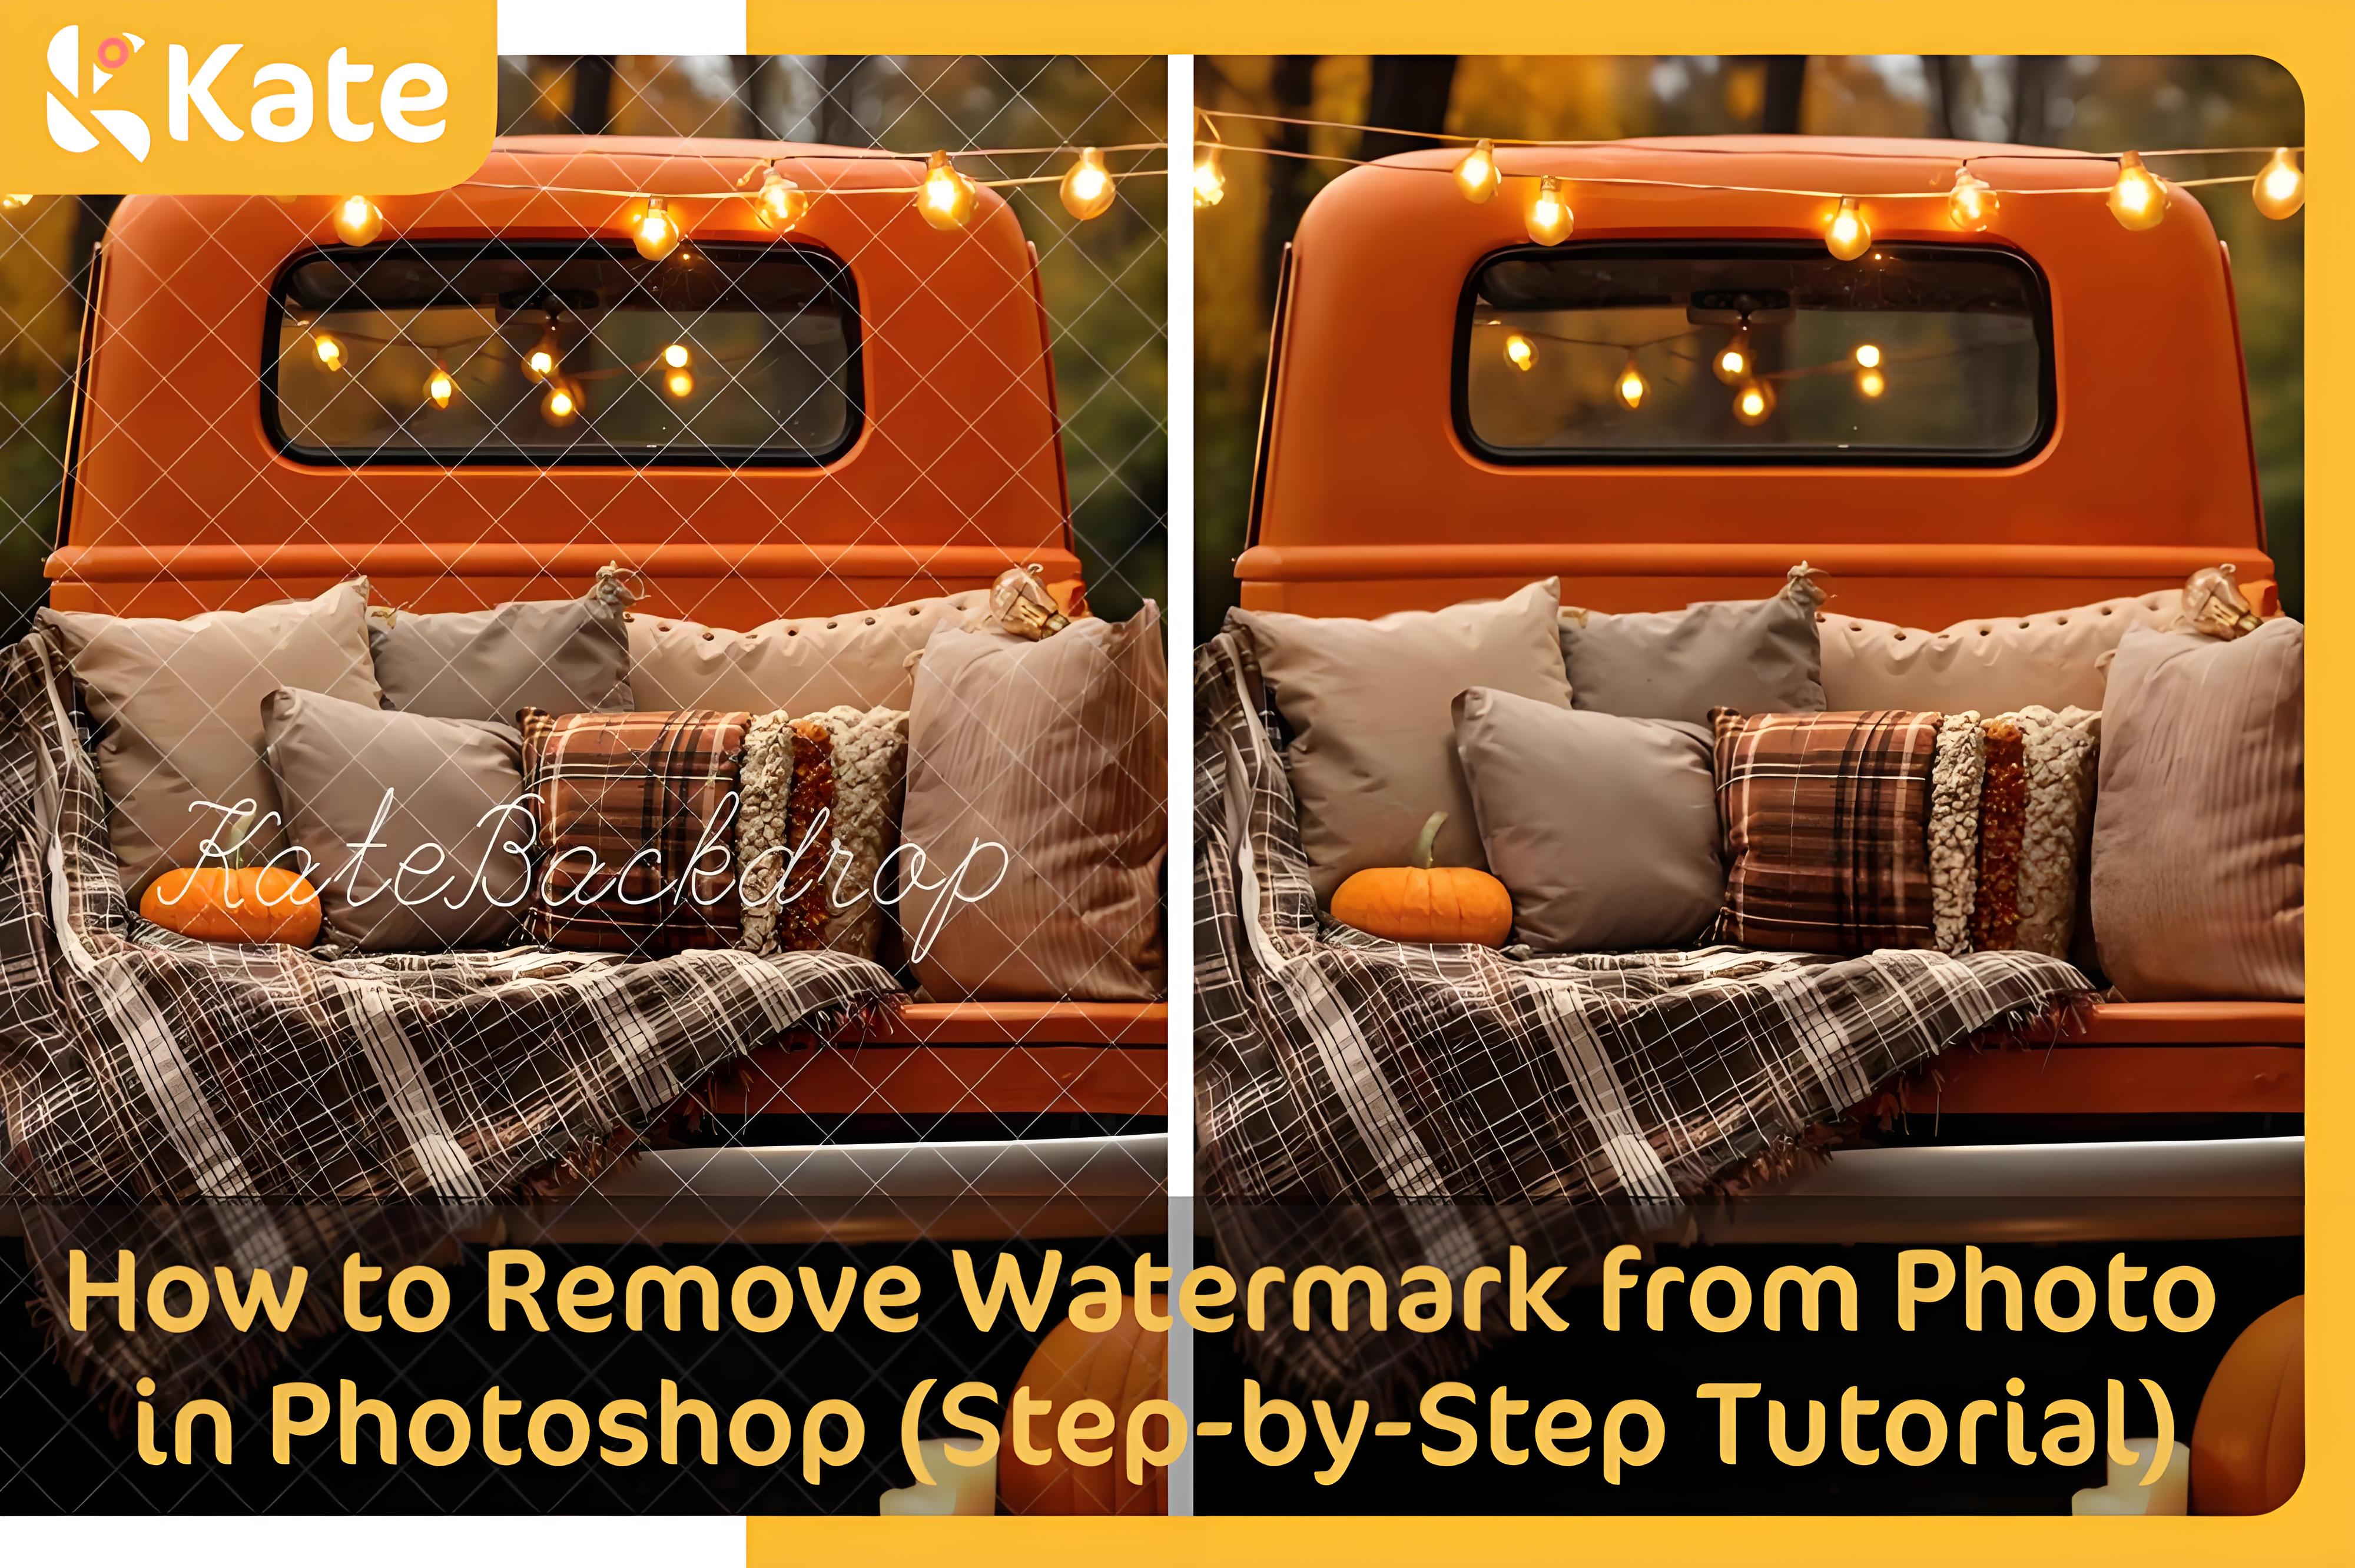
Can I remove a watermark from a picture?
Yes, you can! There are several ways you can do so. Some ways include using software like Adobe Photoshop, editing manually with a brush, and utilizing graphic design tools (like Canva itself). But if you’re struggling and want a full tutorial, you can get guidance on how to remove watermarks from photos.
What if my logo has a background?
We know, we know… sometimes logos have an unnecessary backdrop that can feel tricky and kind of annoying. But no worries at all! If your logo seems to have a background, you can easily select the image on Canva or Photoshop, then click the Background Remover button from the toolbar at the top. Voilà, background removed. Yes, it’s as easy as it sounds.


Weekly Picks 15%OFF