





 Christmas


✨ Build your dream setup!
×


How to Set Up a Photo Backdrop: Complete Installation Guide

Setting up a photo backdrop the right way makes everything after it easier: cleaner framing, fewer wrinkles, better lighting, and less time wasted on set. This guide walks through the full installation process, from choosing your space to hanging the backdrop and setting your lights, then points you to detailed guides for each specific method.
If you are new to backdrops, start with the Handbook of Photography Backdrops for the full overview. If you already know what you are shooting, keep reading. This page is your installation starting point.
Choose Your Setup Space
Before you install anything, look at the space you have to work with. Three measurements matter most:
• Width: enough room for the backdrop, plus space on either side.
• Ceiling height: tall enough for full-length work if you shoot standing portraits or fashion-style images.
• Depth: room for the subject, separation from the backdrop, and space for your lights and camera.
You will also want a few feet between the subject and the backdrop so shadows do not fall directly onto it. For a full breakdown of spacing and room layout, see the Studio Space Guide.
Choose the Right Installation Method
How you install a backdrop depends on your space, your backdrop type, and how often you set up and tear down. The main options include:
• Backdrop stand — the most flexible choice; works in many spaces and adjusts to different widths and heights.
• Wall mount or no stand — useful for permanent or small-space setups using tape, clamps, Velcro, magnets, or a frame.
• Ceiling or rail mount — clean and out of the way for dedicated studios, and useful when you need to store or swap multiple backdrops without taking everything apart.
• Collapsible or pop-up backdrop — the fastest option for on-location work and quick sessions.
If you are not sure which method to use, a stand is usually the safest all-rounder. A wall mount works well when floor space is tight or when the backdrop can stay in one place.

Install a Backdrop Stand or Wall Mount
If you are using a stand, extend the crossbar to match your backdrop width, set the uprights to a stable height, and lock everything before loading the backdrop. Make sure the stand’s rated width, height, and weight capacity fit the backdrop you plan to hang. For full selection and setup help, read Everything to Know Before Buying a Backdrop Stand.
No stand? You can mount a backdrop directly to a wall with tape, clamps, Velcro, magnets, or a simple frame. Each method suits a different backdrop weight and wall surface. The full step-by-step guide is in How to Hang a Backdrop on a Wall Without a Stand.
Hang the Backdrop Correctly
However you mount it, aim for a level top edge and even tension across the width. A crooked or loosely hung backdrop shows up quickly in camera.
• Hang from the top and let gravity help pull the surface flat.
• Keep tension even so the fabric does not sag or pull to one side.
• For fabric and microfiber backdrops, a pole pocket or clips along the top can help keep the edge straight.
• For paper rolls, unroll only what you need and secure the end.
Smooth Wrinkles and Secure the Floor
Wrinkles are one of the most common backdrop setup problems, and many are preventable. Hang the backdrop before your shoot so gravity can do some of the work, then use a method suited to your material, such as steaming, gentle heat, or simply letting it hang overnight.
If your shot includes the floor, create a smooth floor-to-wall transition. Let the backdrop sweep down and forward without a hard crease, and secure the bottom edge so it stays flat underfoot.
Set Lights and Camera Distance
Once the backdrop is up, position your subject a few feet in front of it to keep shadows off the background and give your lights room to work. Then set your camera distance based on the framing. Headshots usually need less room, while full-length and group shots need more depth.
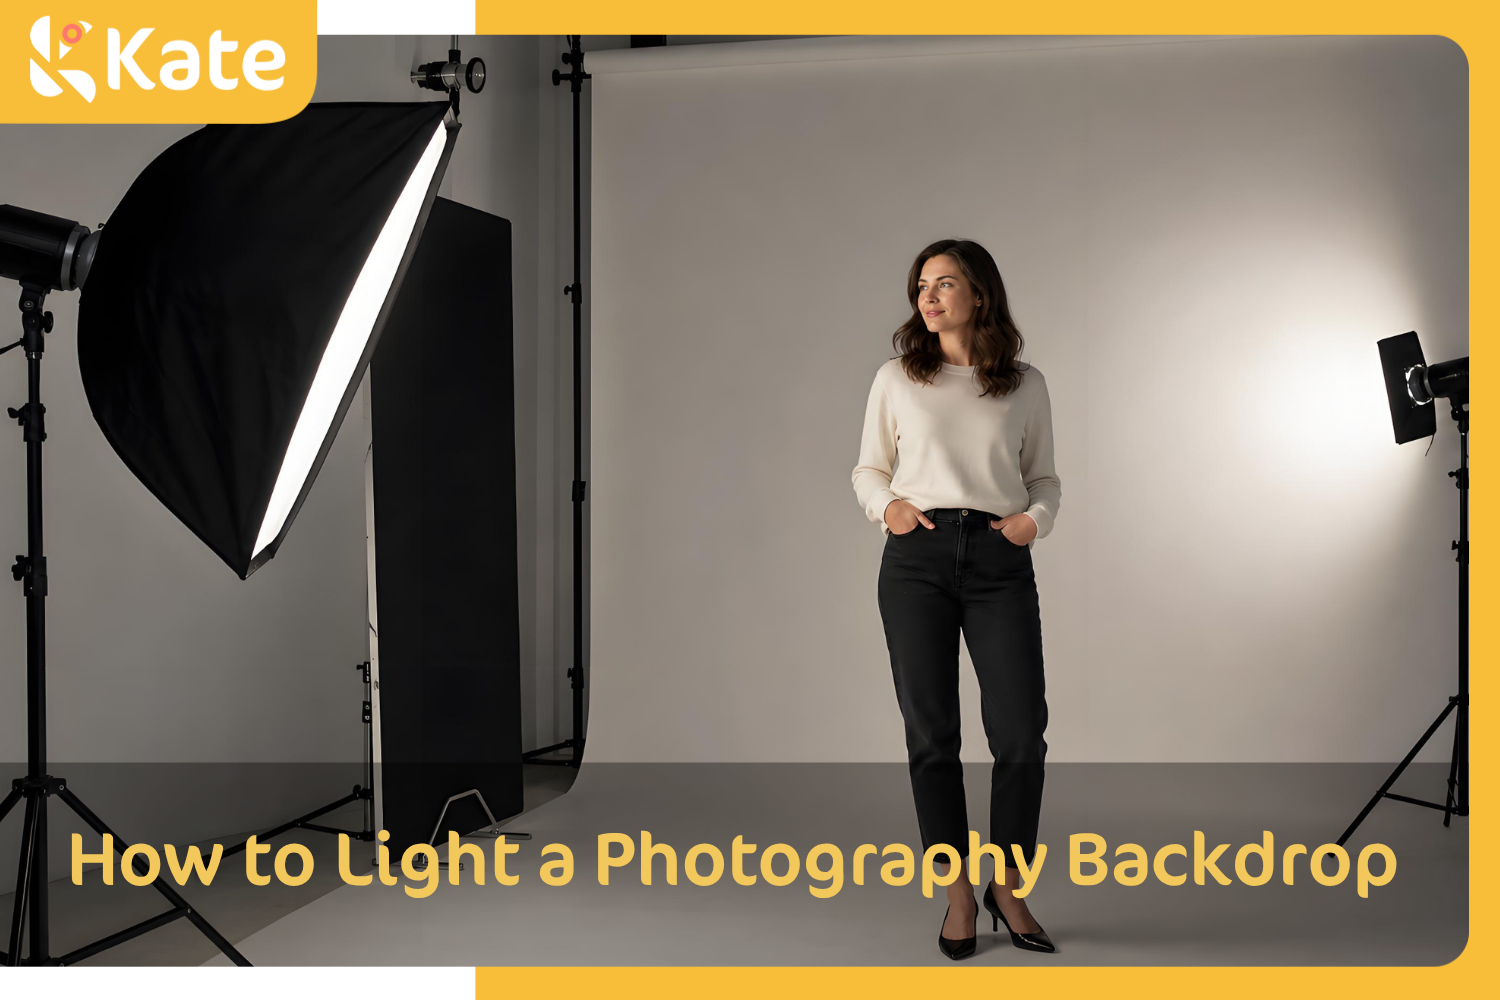
Lighting the backdrop is its own skill: use even coverage for clean looks and controlled falloff for moodier ones. For the full approach, read How to Light a Photography Backdrop. If shadows are landing on the backdrop, How to Avoid Shadows on Backdrops covers the quick fixes.
Setup by Backdrop Type
Each material installs a little differently:
• Fabric and microfiber: Hang from the top with clips or a pole pocket, then steam wrinkles while the backdrop is hanging.
• Paper rolls: Mount on a stand or wall support, unroll from the top, and cut off used sections when needed. See Seamless Background Paper.
• Collapsible or pop-up backdrops: Open quickly for simple sessions or on-location work. Folding them back down cleanly takes a bit of practice. See the detailed tutorial in the Collapsible Backdrop Guide.
• Vinyl: Hang flat and let the surface settle before shooting, especially if there are bends, uneven tension, or visible marks.

Setup by Shoot Type
• Headshots and products: Use a smaller footprint, clean framing, and minimal floor coverage.
• Portraits and 3/4-length: Allow more height and moderate subject separation.
• Families and groups: Prioritize width and a stable stand, and leave enough room for people to move.
• Full-length and fashion: Add a floor sweep and make sure you have enough ceiling height.
• Events: Use a wide, stable setup that can handle movement and more people in the frame.
Not sure what size to hang for each type of shoot? Check the Photo Backdrop Size Chart.
Troubleshooting and FAQs
The backdrop keeps sagging.
Increase tension across the top, or use more clips or clamps along the edge.
There are hard creases I cannot remove.
Hang it longer before shooting, then use gentle steam or heat if it is suitable for the material.
Shadows keep landing on the background.
Move the subject farther forward and soften the light. See How to Avoid Shadows on Backdrops for more help.
My stand is not wide or tall enough.
Match the stand’s rated width and height to your backdrop before buying. See the Stand Buying Guide.
No room for a stand?
Use a wall-mounted setup instead. How to Hang a Backdrop Without a Stand explains the main options.
Related Guides
• Handbook of Photography Backdrops — the full overview
• Everything to Know Before Buying a Backdrop Stand
• How to Hang a Backdrop on a Wall Without a Stand


Weekly Picks 15%OFF