Custom Printed Fabric Backdrops
 Custom Rubber Floor Mats
 Custom Collapsible Backdrops(double-sided)
 Custom Hand Painted Canvas Backdrops
 Custom Vinyl Backdrops
 Arch
Arch


In this article, we'll dive into some tutorials that will teach you how to make a white background in Lightroom and Photoshop, helping you take your photos to the next level.
How to Make A White Background in Lightroom
Step 1: Make Sure Your Lightroom Has Been Updated to the Newest Version
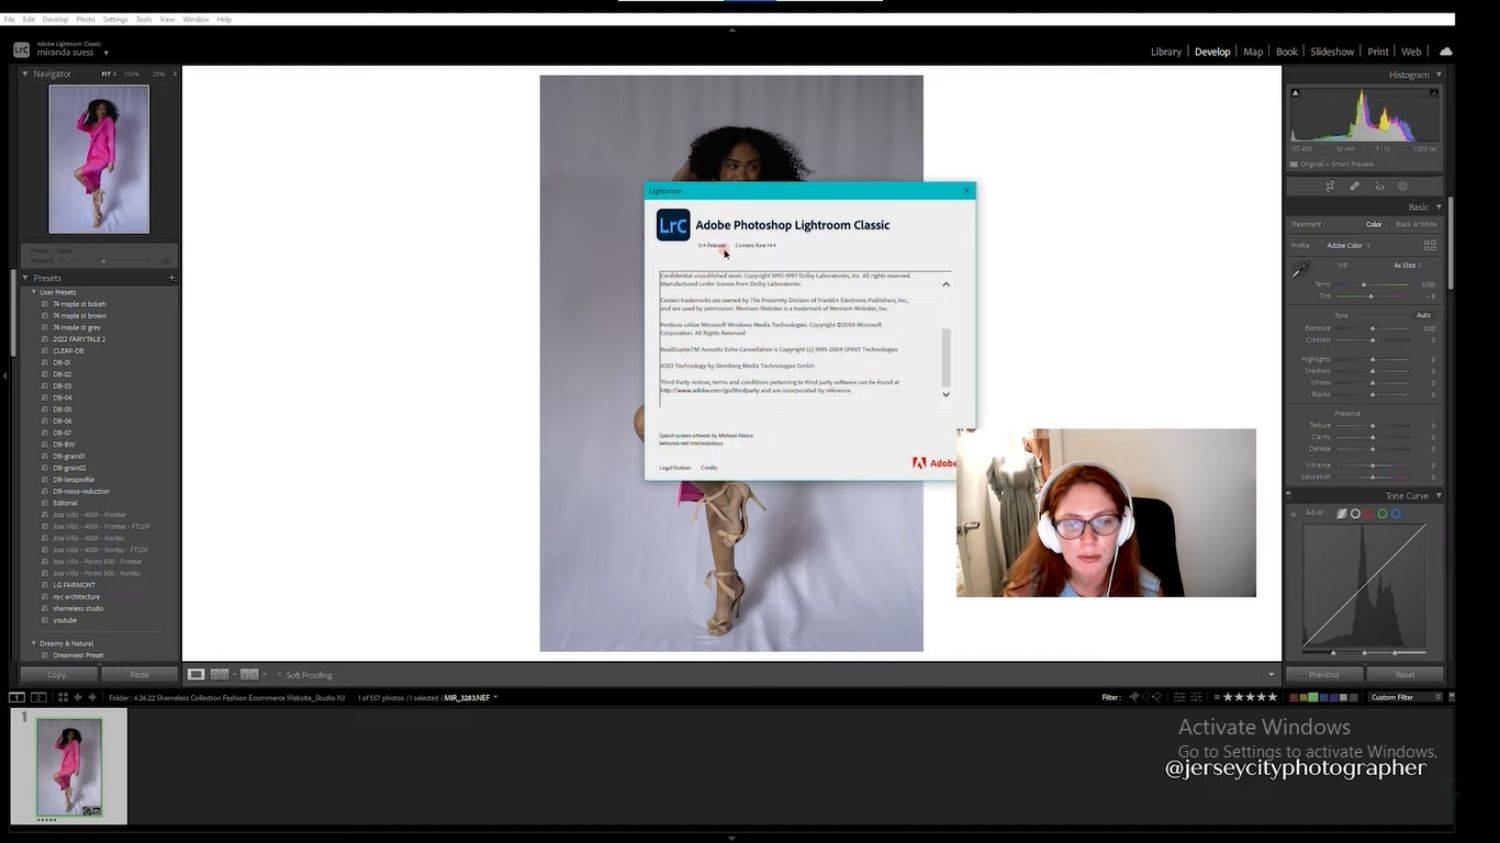
It's essential to have the latest version of Lightroom. You can check your version by selecting "Help" and "About Lightroom Classic." Having the most updated version is important, as it contains the latest features and bug fixes.
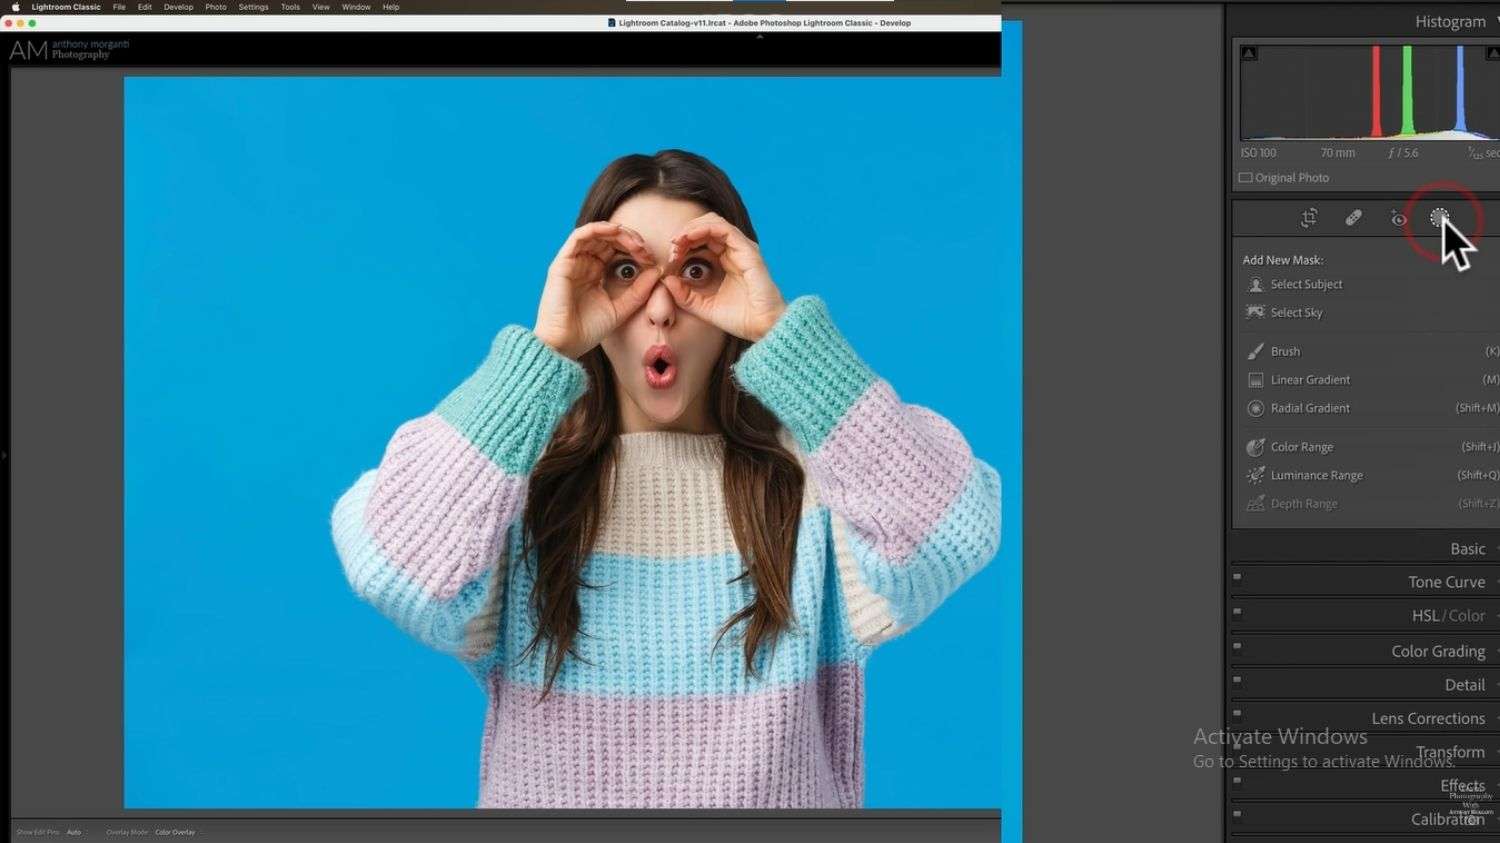
Step 2: Select the Masking Tool
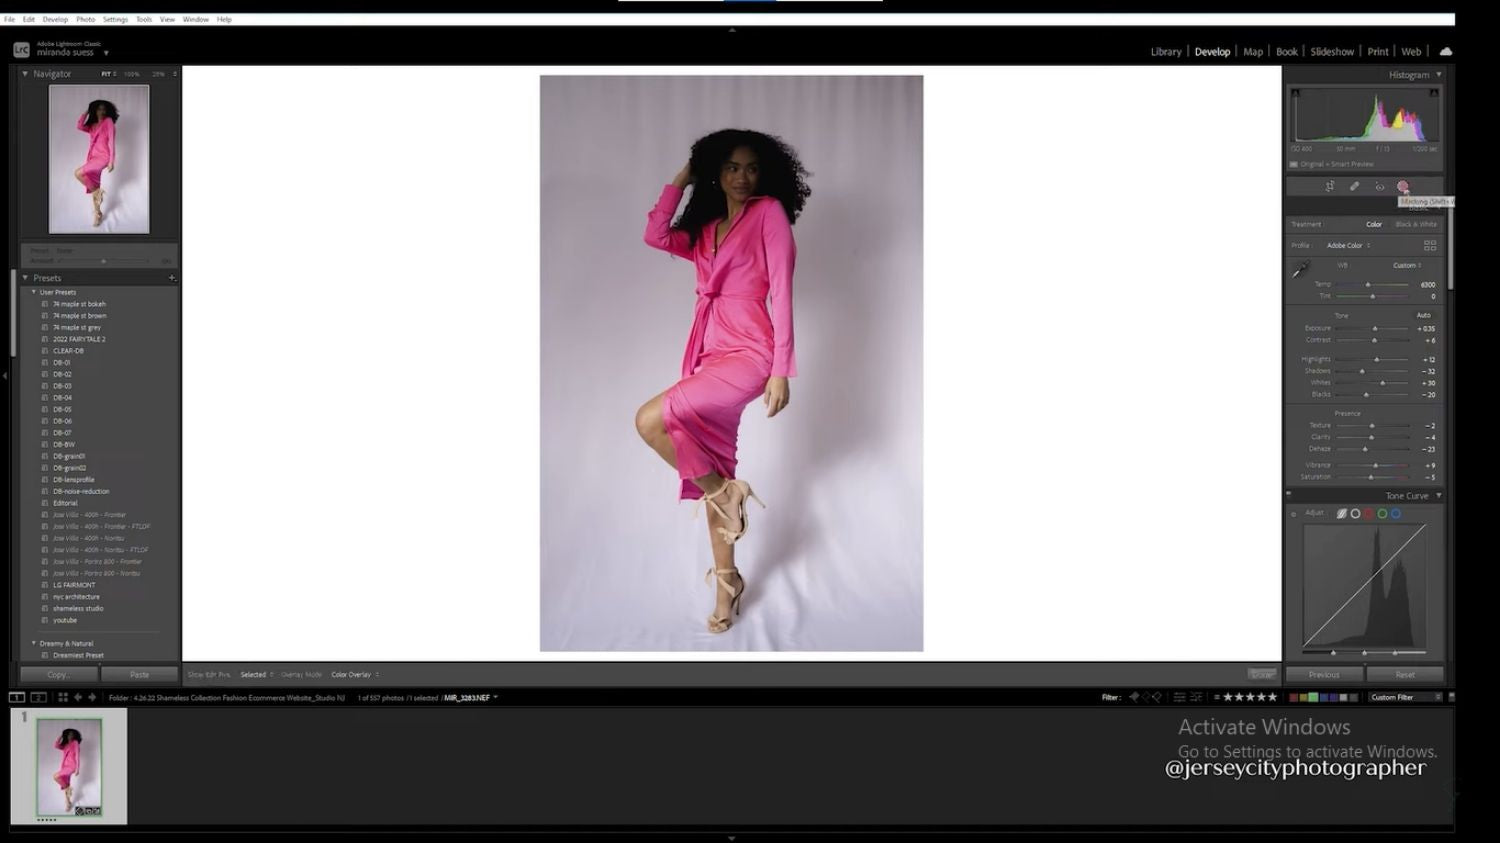
To begin, select the masking tool. Lightroom is going to select your subject perfectly.
Step 3: Adjust Exposure, Shadows, and Highlights
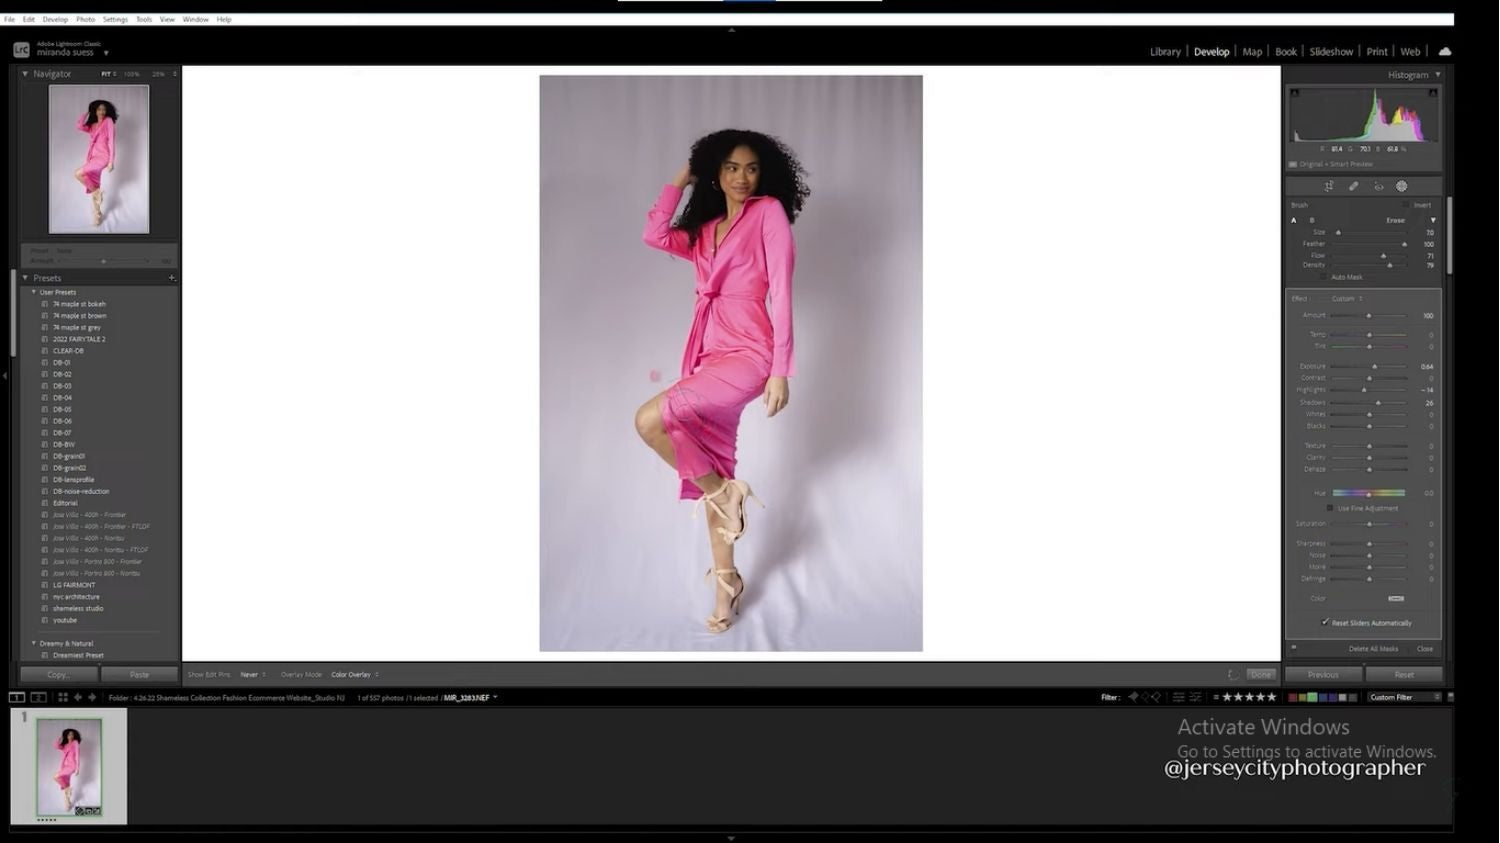
Start by increasing the exposure just a little bit. Then, bring up the shadows and bring down the highlights slightly. Next, remove the unwanted parts by hitting the backward bracket to make the brush larger. Adjust the flow, feather, and the density until you're satisfied.
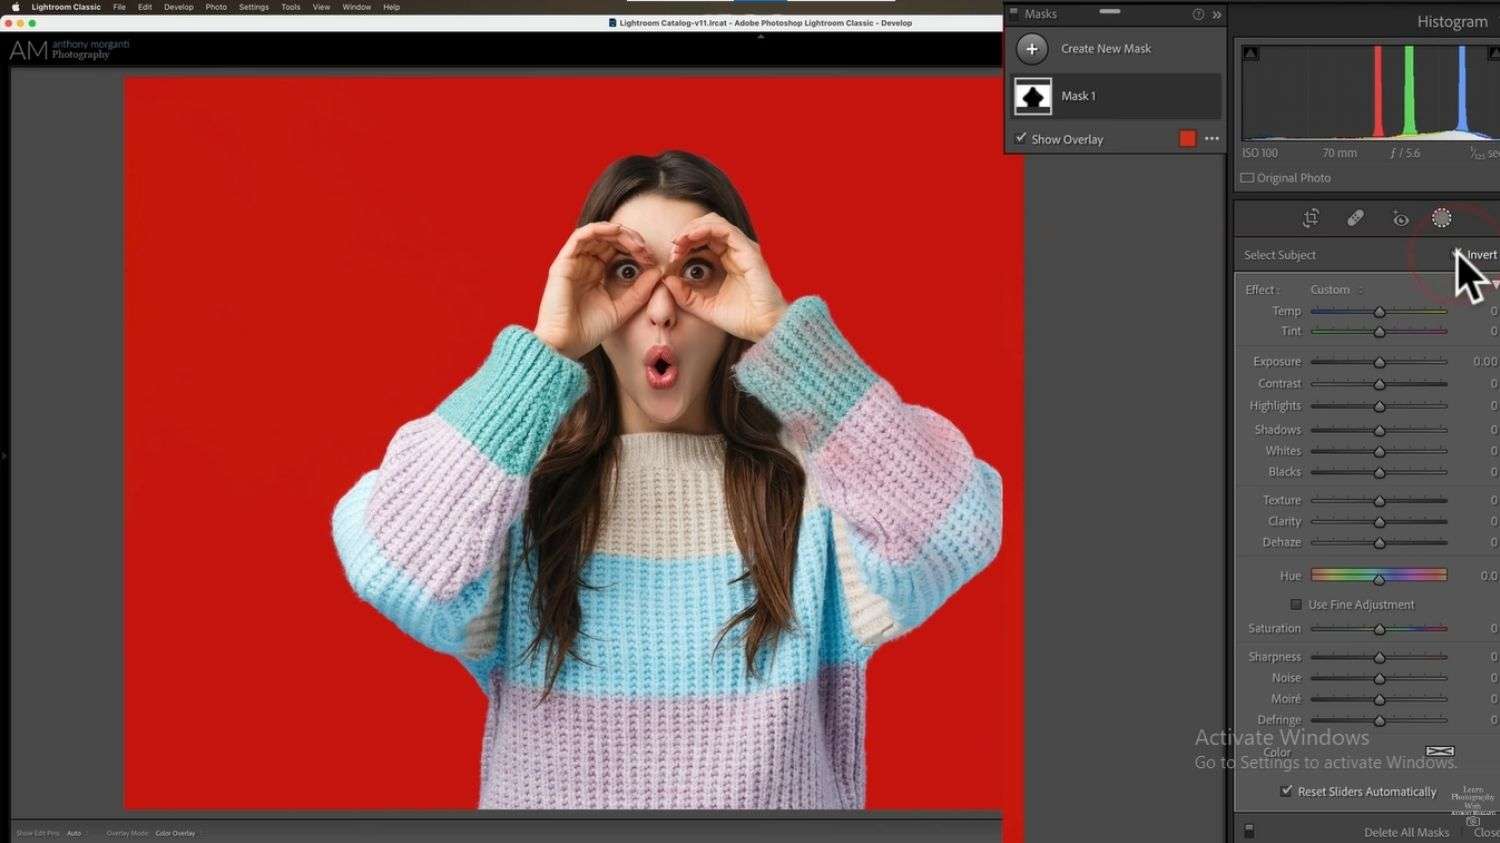
Step 4: Invert the Mask and Increase the Exposure
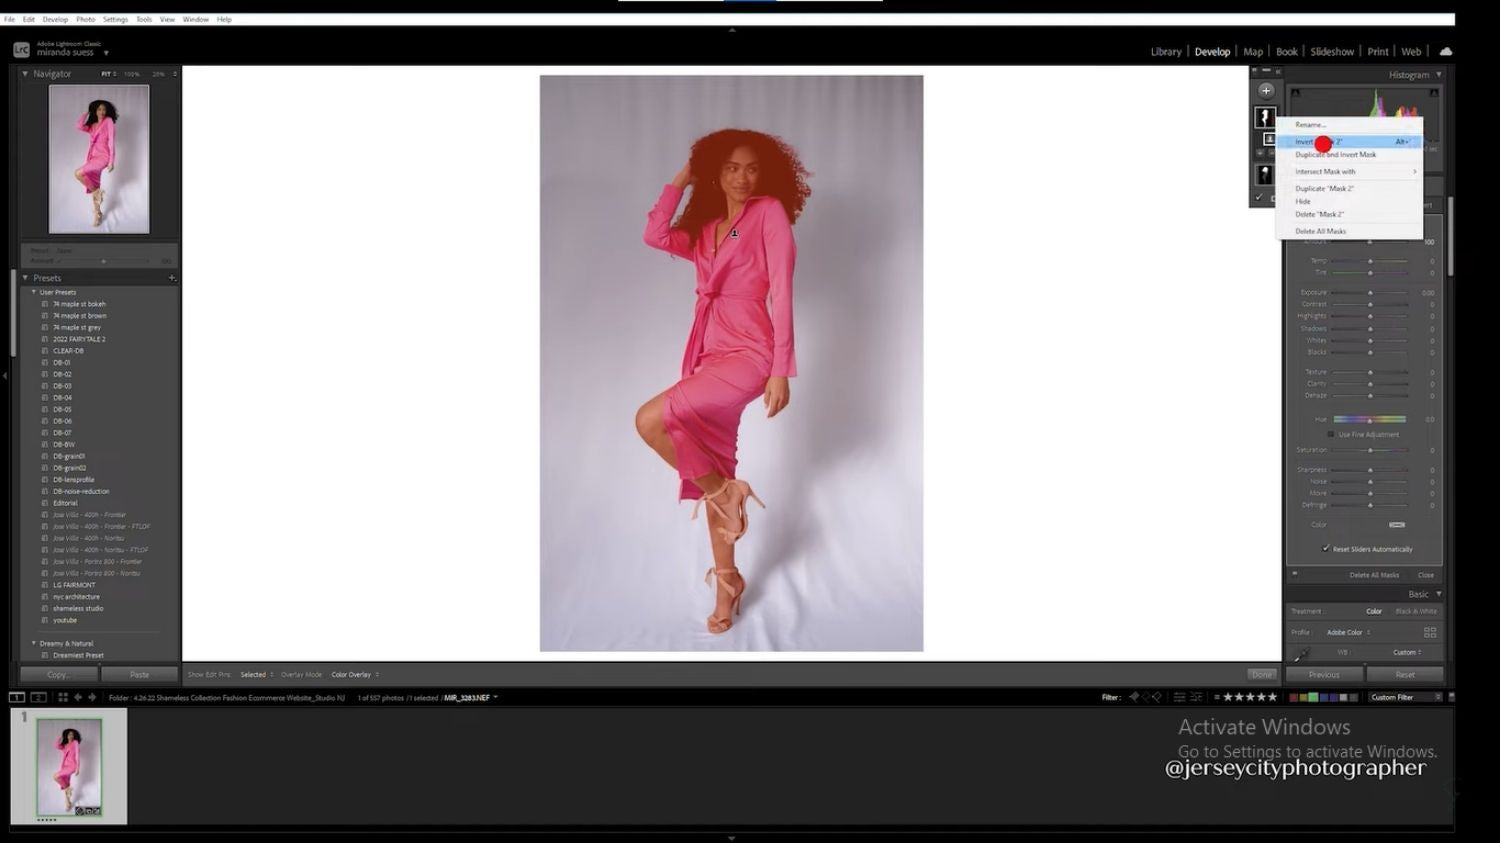
Now it's time to make the background white. Add another mask and select the Subject again. Invert the mask by right-clicking and selecting "invert mask." Then, bring the exposure up.
Step 5: Adjust Shadows and Highlights Again
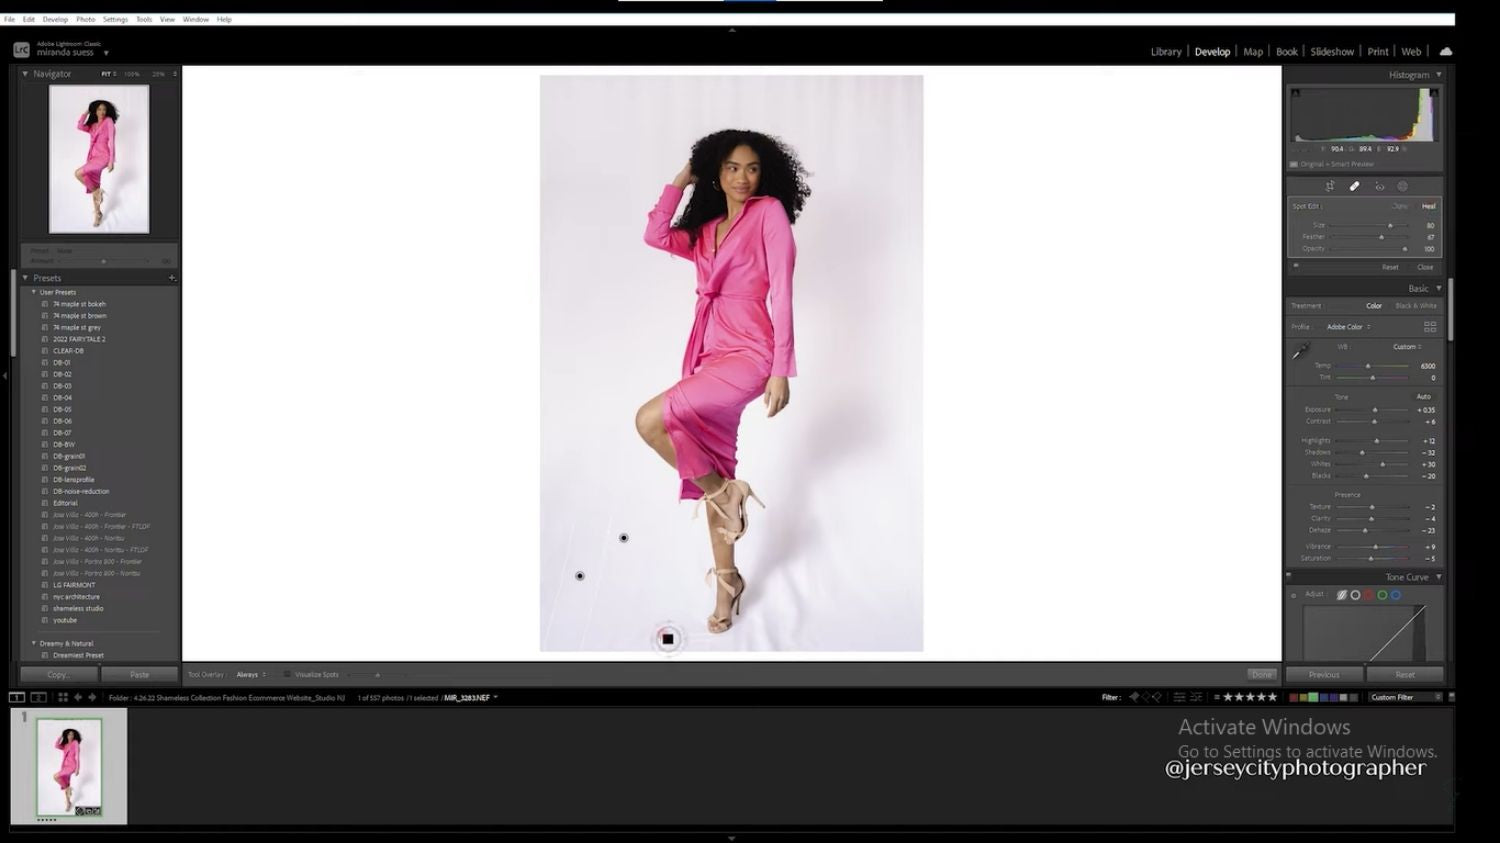
Image credit: youtube.com
Adjust the shadows and highlights again until you like the result. If there are still parts of the mask you want to remove, you can subtract them using the brush tool again. Just adjust the density and flow until you get the desired result.
Essential Tips
- Ensure your Lightroom is updated to the latest version to take advantage of the latest features and tools.
- Use a preset that enhances the brightness of the whites and softens the skin for a studio image.
- When adjusting exposure and tones, pay attention to the subject's skin tones and shadows.
- Refine the mask using the masking tool to remove any unwanted areas.
- Use the Exposure and Shadows sliders to specifically adjust the subject's exposure and shadows.
- Fine-tune tones and white balance to achieve the desired look.
How to Make A White Background in Photoshop
Step 1: Select the Whites Using Color Range
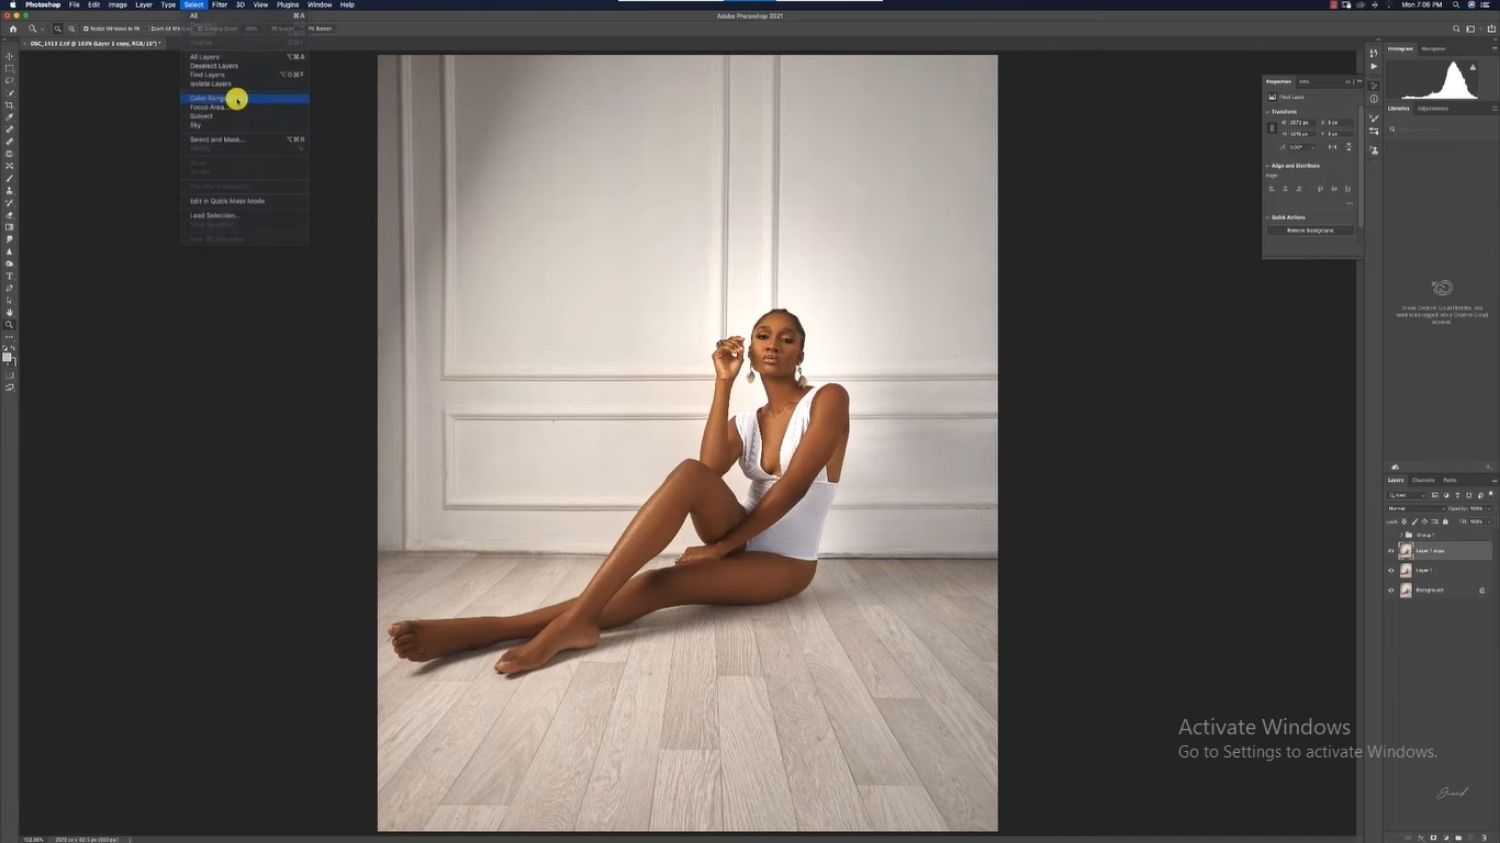
You will use the Colour Range tool to select the white areas of the Image. To access it, go to Select > Color Range. In this dialog box, use the eyedropper tool to select the white areas of your Image. You can adjust the fuzziness slider to increase or decrease the selection's tolerance.
Step 2: Refine the Selection Using Quick Selection and Lasso Tools
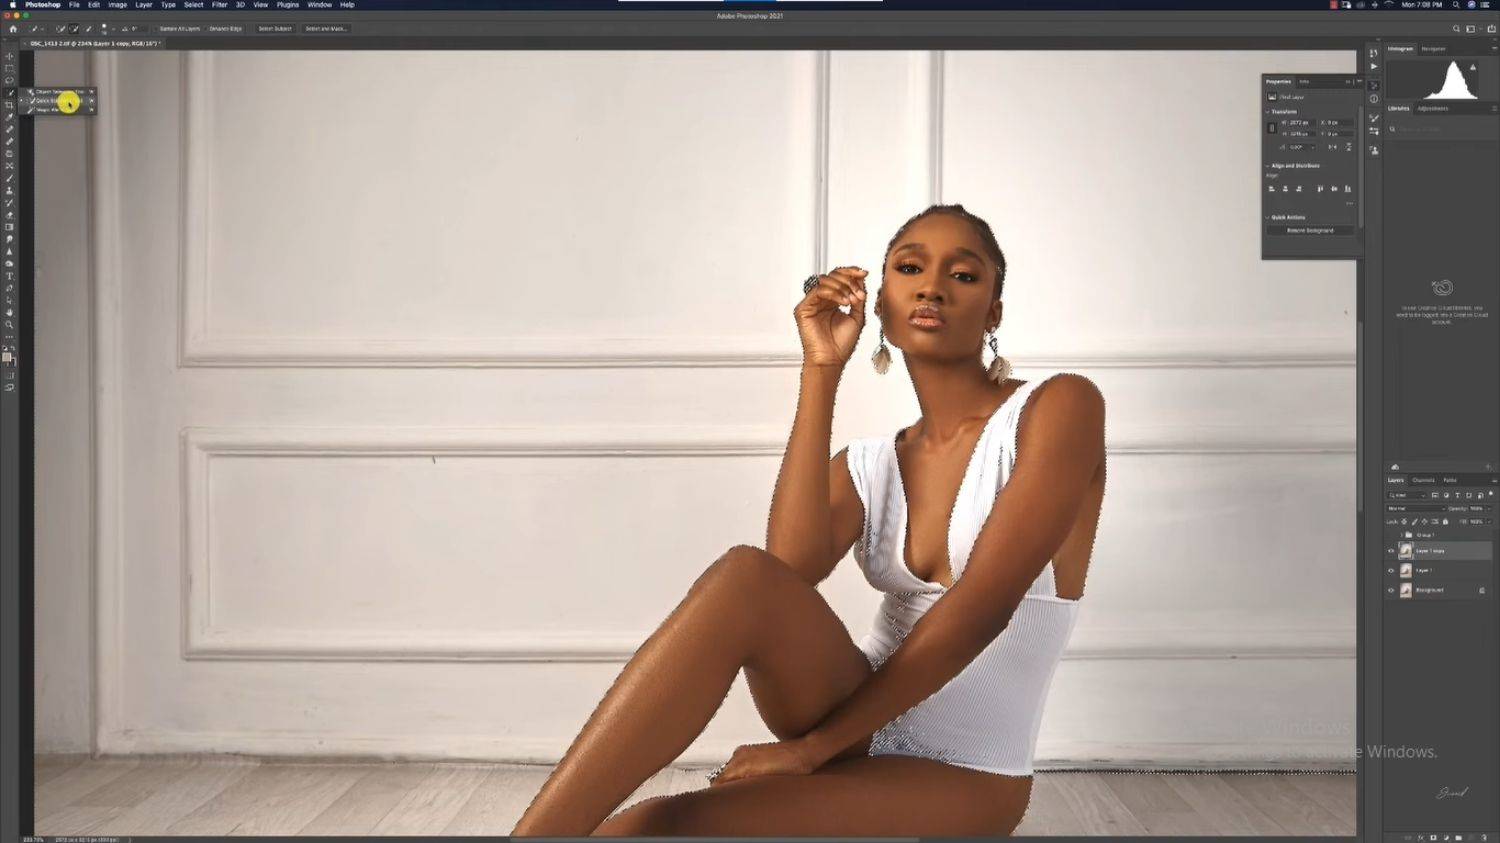
You can use the Quick Selection and Lasso tools to refine the selection not be selected correctly.
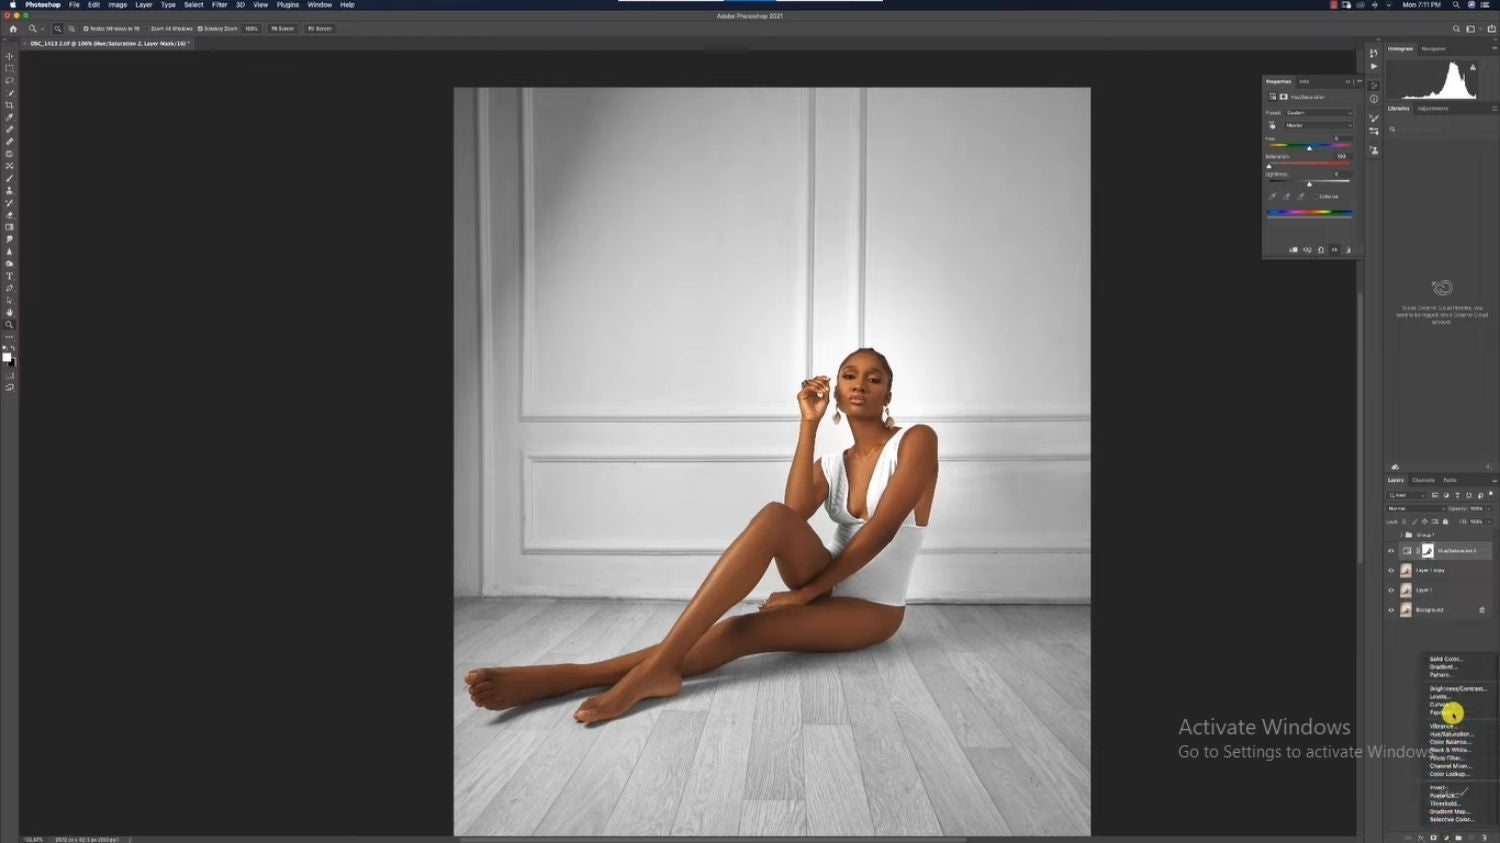
Step 3: Adjust the Saturation
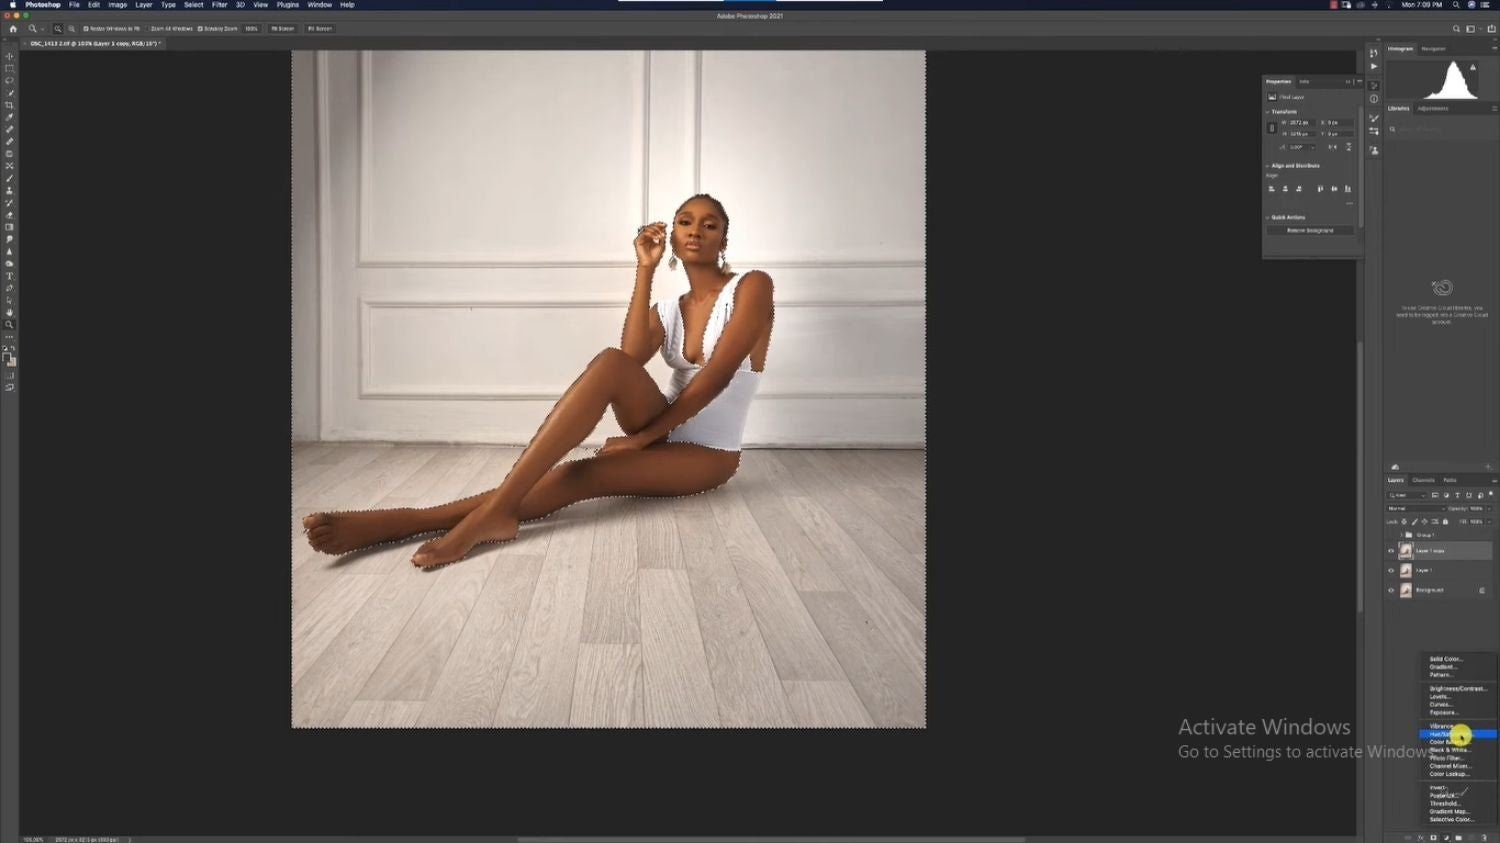
Add a Hue/Saturation adjustment layer by clicking the Adjustment Layer button at the bottom of the Layers panel and selecting Hue/Saturation. Select the whites in the dropdown menu in the Hue/Saturation dialog box and reduce the saturation to.
Step 4: Adjust the Levels
Create another adjustment layer with levels and clip it to the layer with the mask. By holding down the Alt key and clicking between the two layers, the adjustments made on the levels layer will only affect the layer with the mask. Then adjust the levels by pulling on the slider to erase the black and make it less intense.
Step 5: Adjust Brightness and Contrast
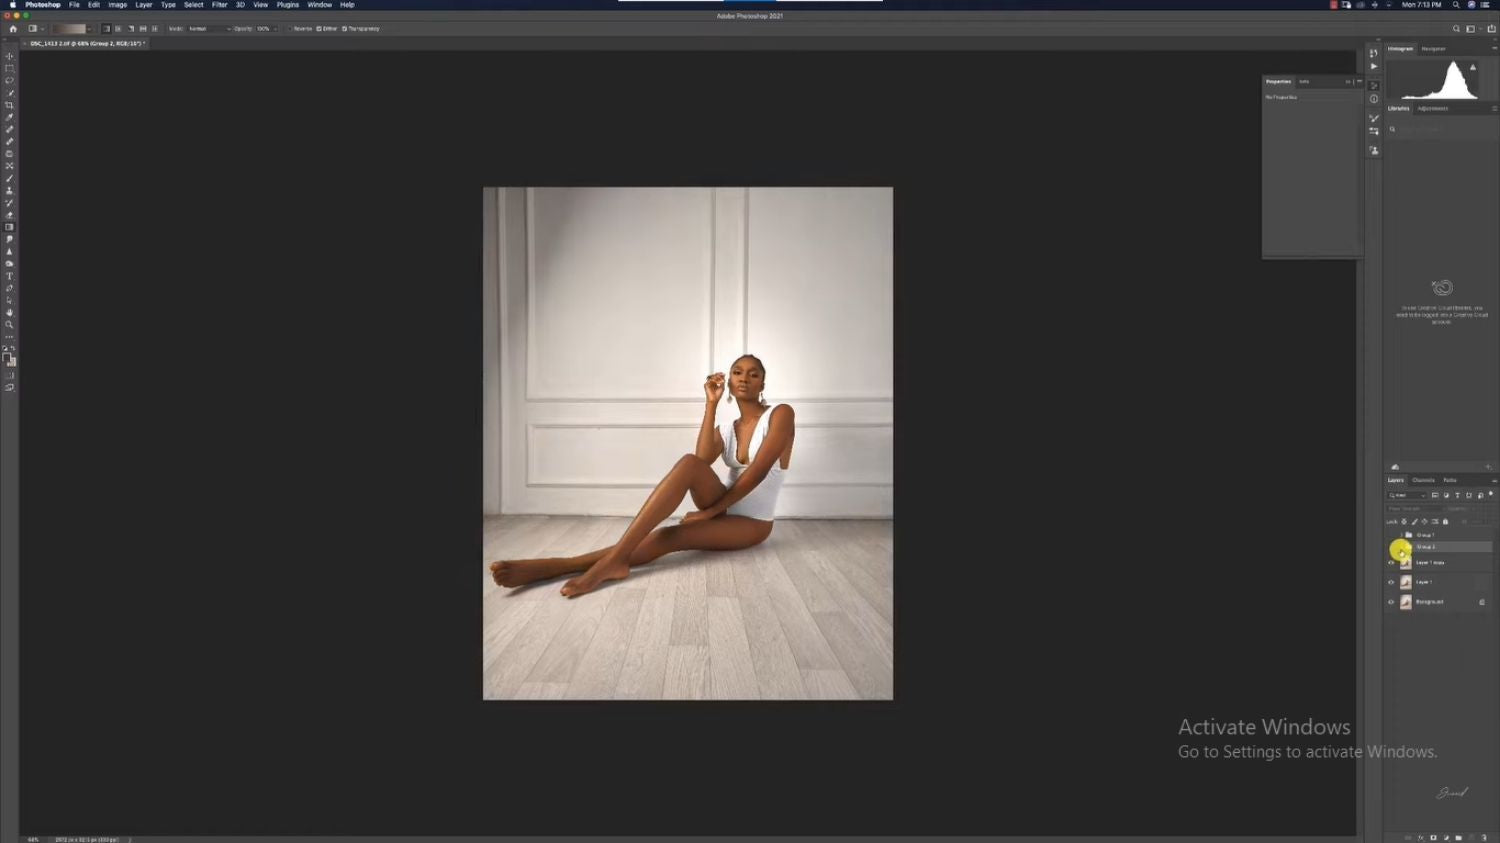
Image credit: youtube.com
Create a new layer for brightness and contrast adjustment. Increase the brightness of the shadow. Then, create and invert the layer mask to hide the adjustments, add a gradient to reveal the adjustments, and gradually blend the background.
Play with The Color of Your Background in Lightroom
Method 1: Use the Mask Tool
First, click on the Mask icon and select the Subject. Invert the selection to select the background.
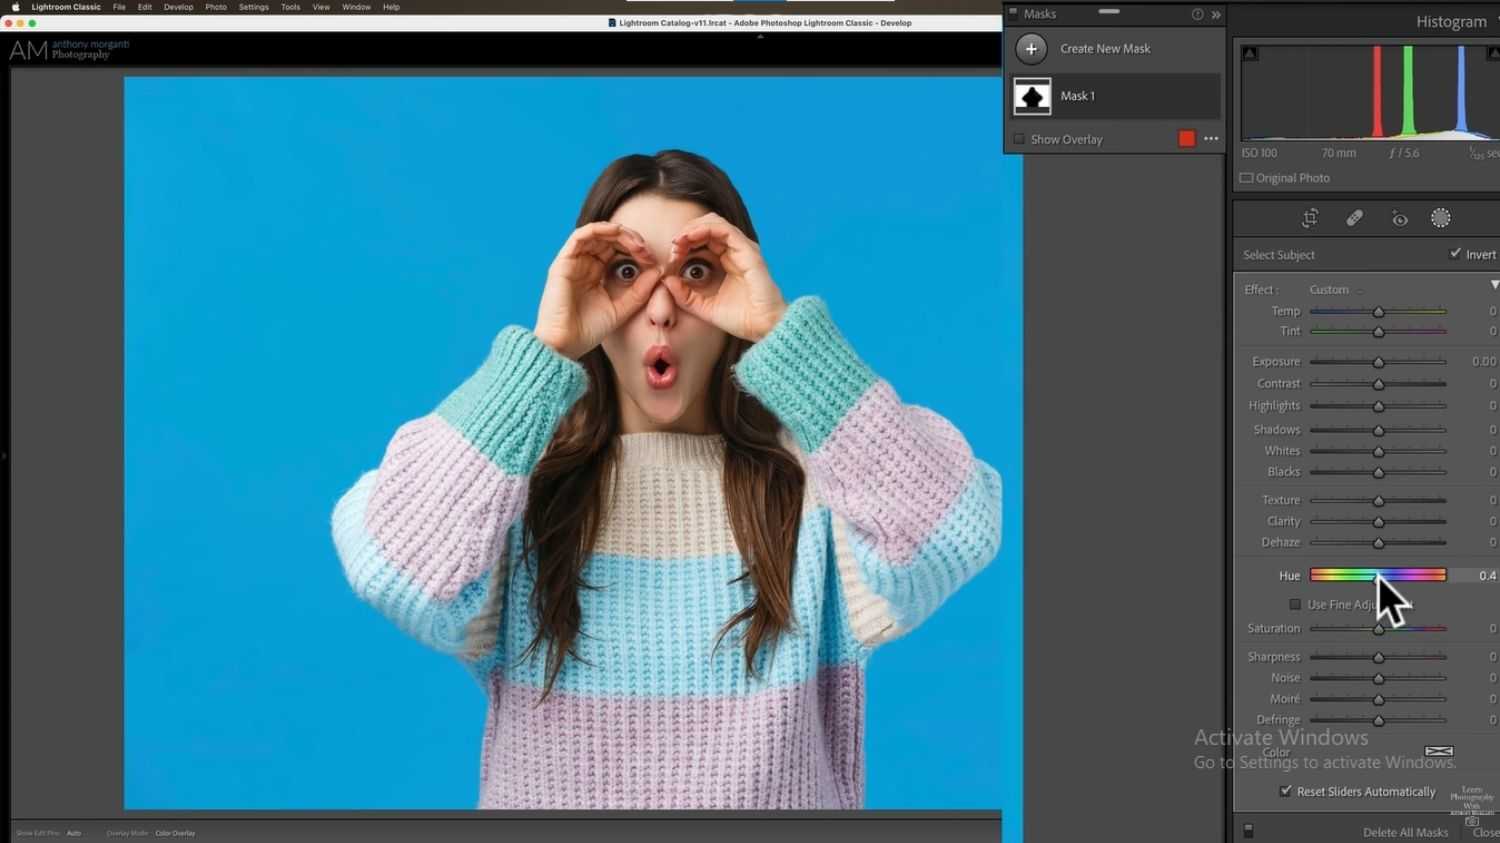
To change the background color, use the hue slider. Adjust other sliders like exposure, contrast, etc., to modify the Image.
Method 2: Create a Radial Gradient
Step 1: Select Your Subject and Invert the Selection
First, you need to select the Subject in your photo. After selecting the Subject, invert the selection so that the background is selected instead.
Step 2: Add a Radial Gradient
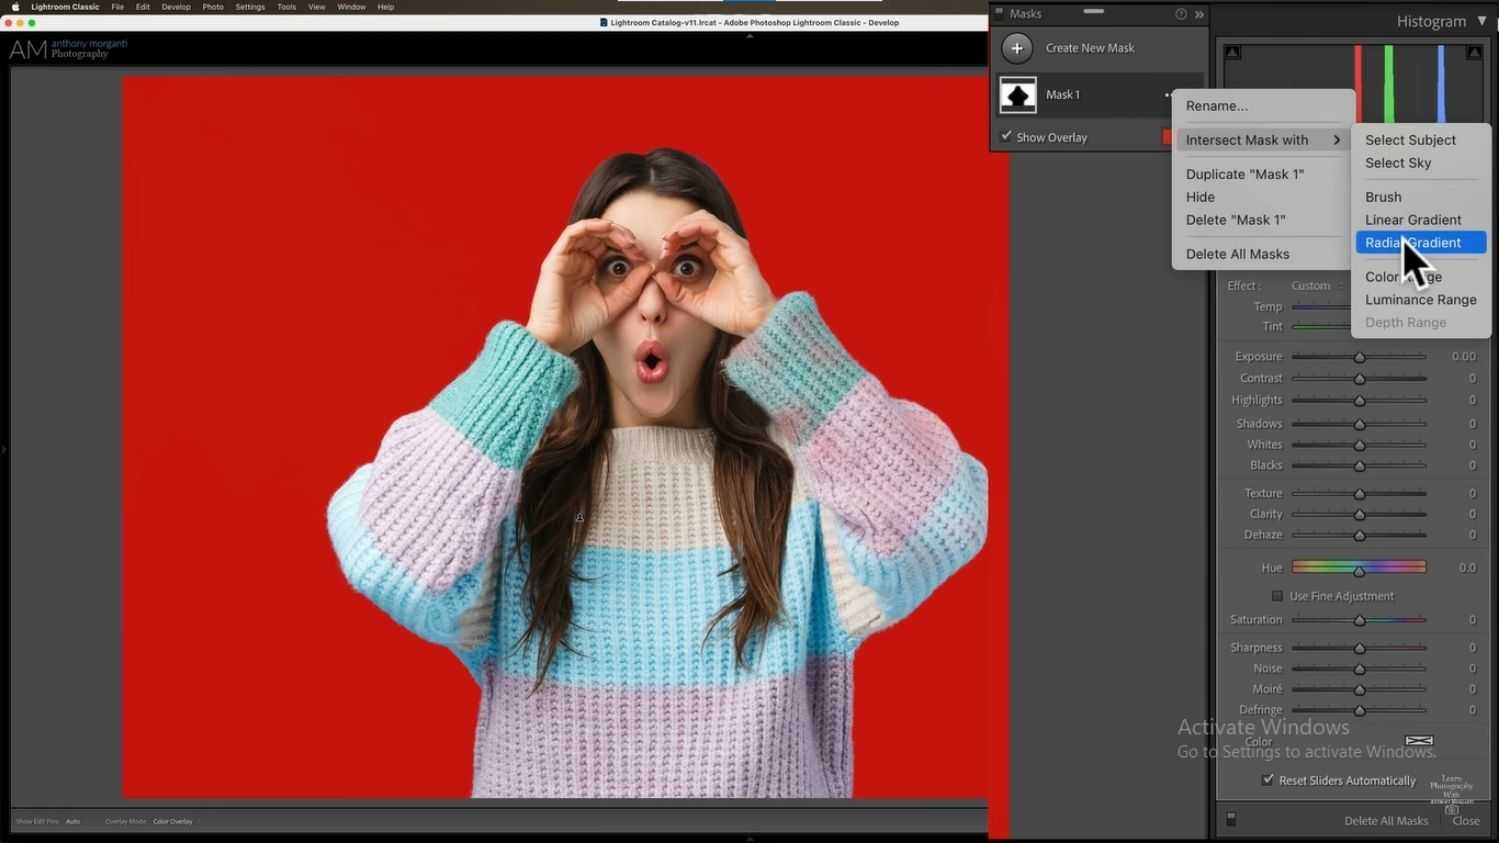
Click on the Mask 1 button in the develop module. Click on the three dots to the right of the mask to intersect the mask with the radial gradient.
Step 3: Draw the Radial Gradient
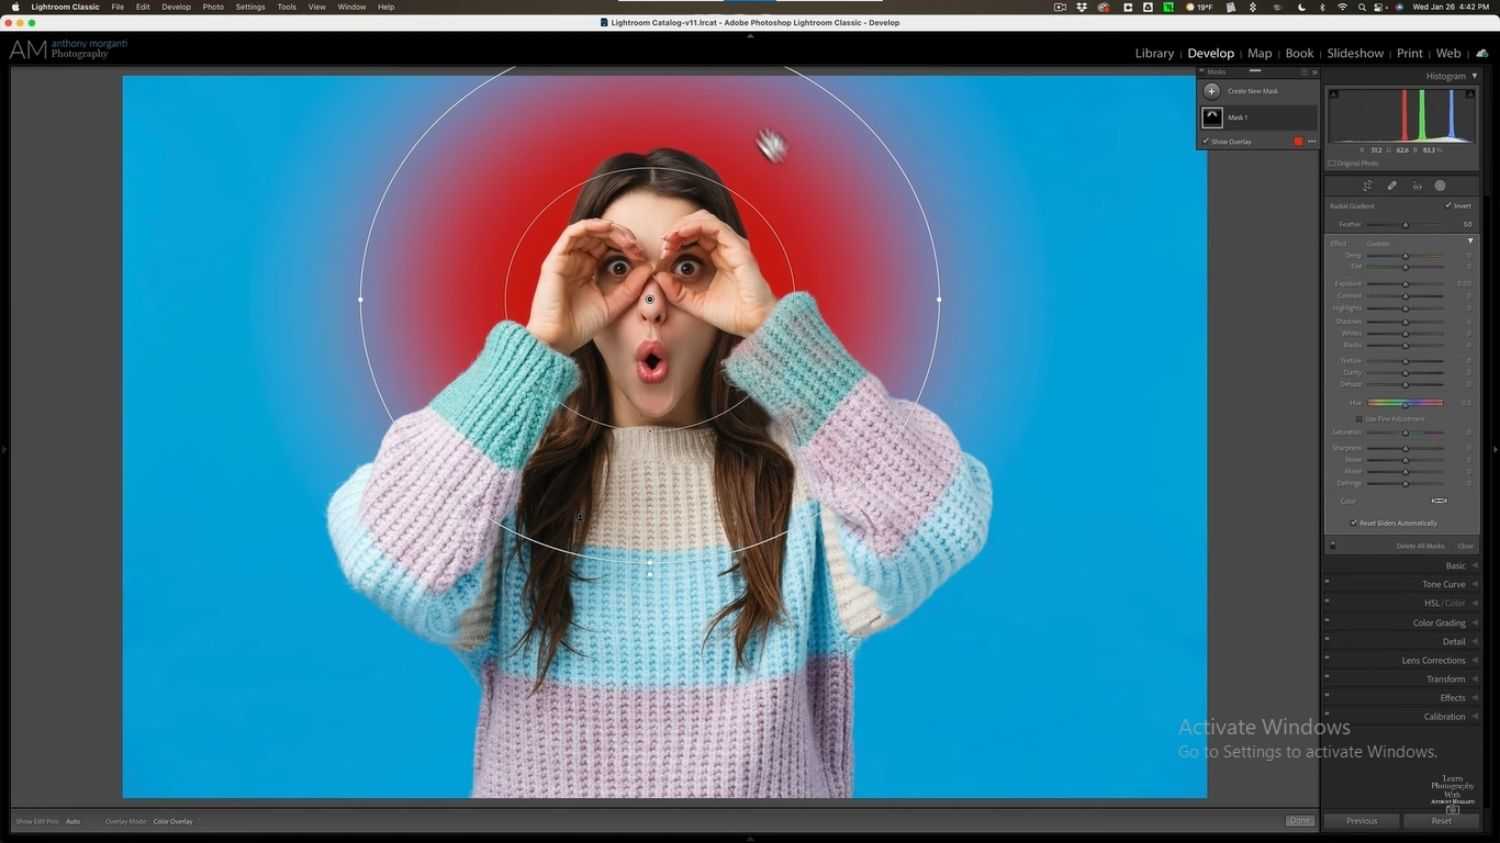
Once you've selected the radial gradient tool, you can draw a gradient over the background. The area inside the gradient will be affected by any changes you make.
Method 3: Create a Linear Gradient
Step 1: Use the Linear Gradient Tool

Click the "Mask" dropdown menu and select "Linear Gradient." Usually, linear gradients are used to darken or make the sky more dramatic.
Step 2: Draw the Gradient on Your Photo
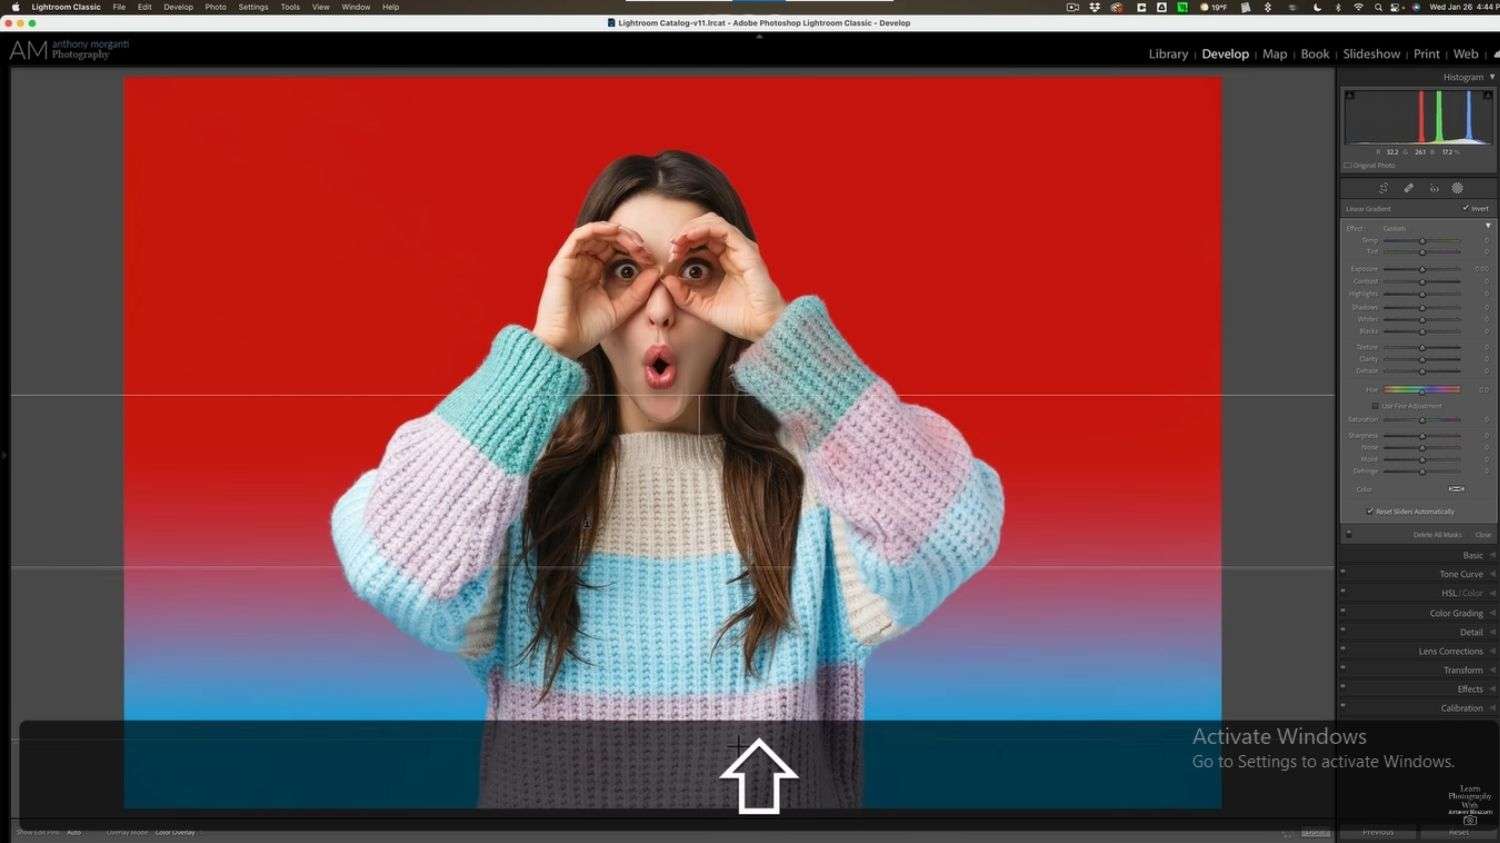
Click and draw the gradient on your photo. If you want to make it perfectly horizontal, hold the shift key while drawing it. You can also draw it from different angles to create a unique effect.
Step 3: Change the Color
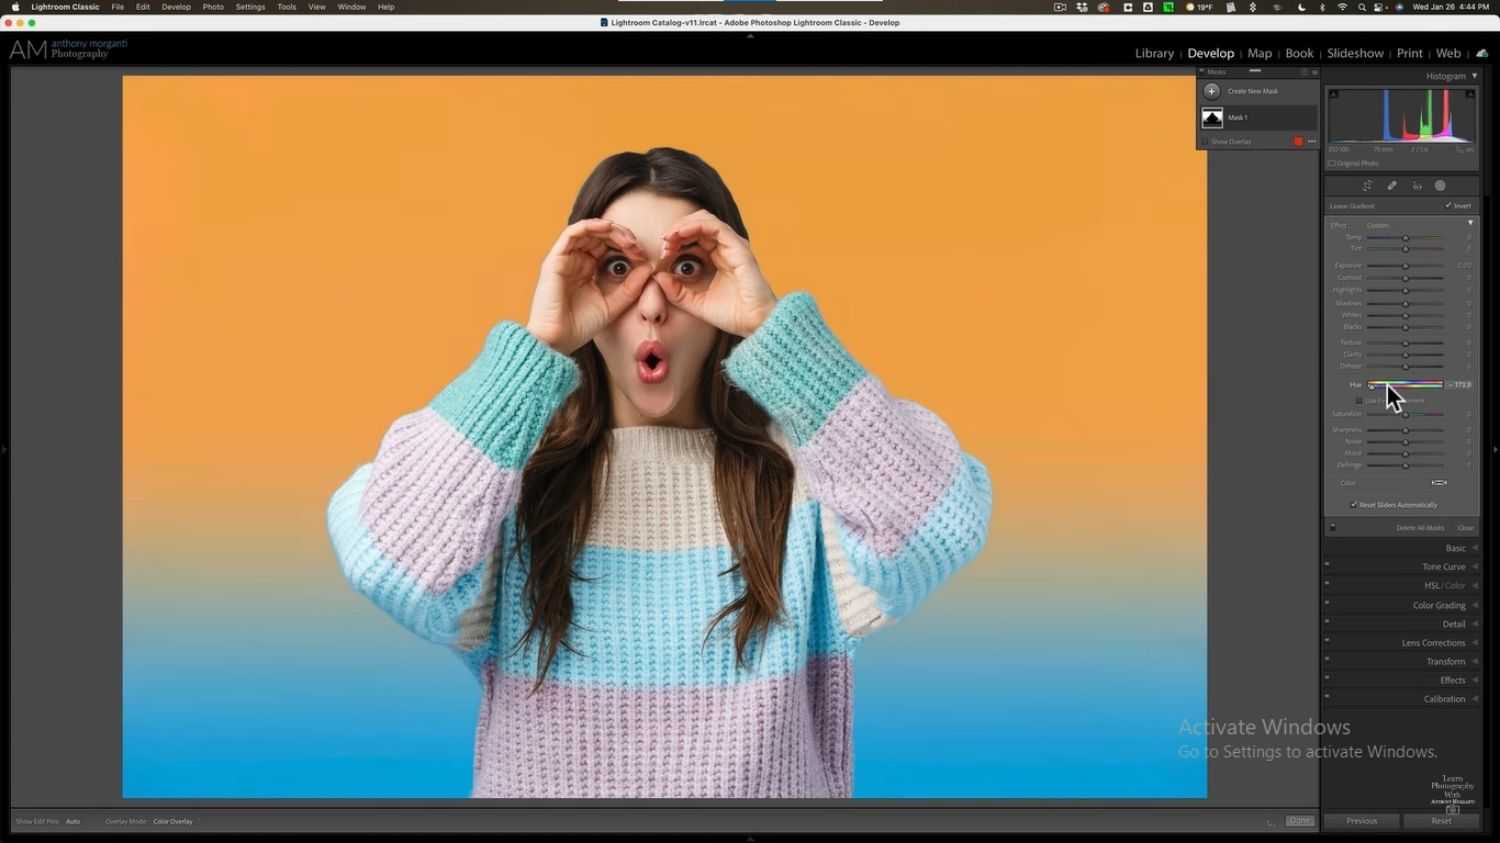
Image credit: youtube.com
Change the color by playing around with the colors until you find the perfect match.
Play with The Color of Your Background in Photoshop
Method 1: Change Color One into White
Step 1: Select the Image and Unlock the Layer

Begin by selecting the Image you want to work with and unlocking the layer.
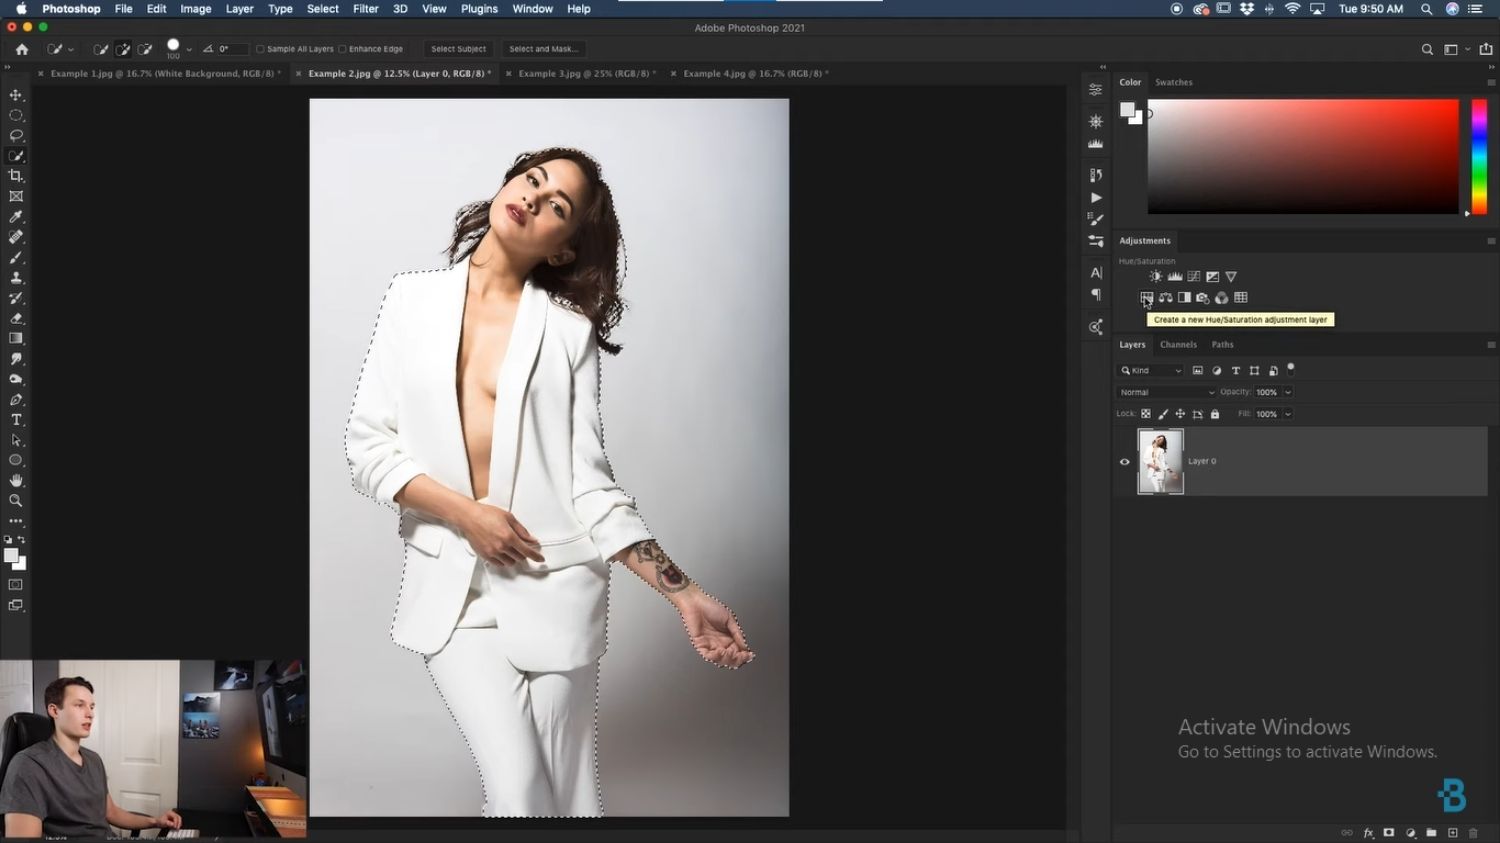
Step 2: Access the Properties Panel
If you do not see the properties panel, go to the Window menu and select it from there. Then choose ‘Select Subject’ since it creates a selection around the Subject.
Step 3: Refine the Selection
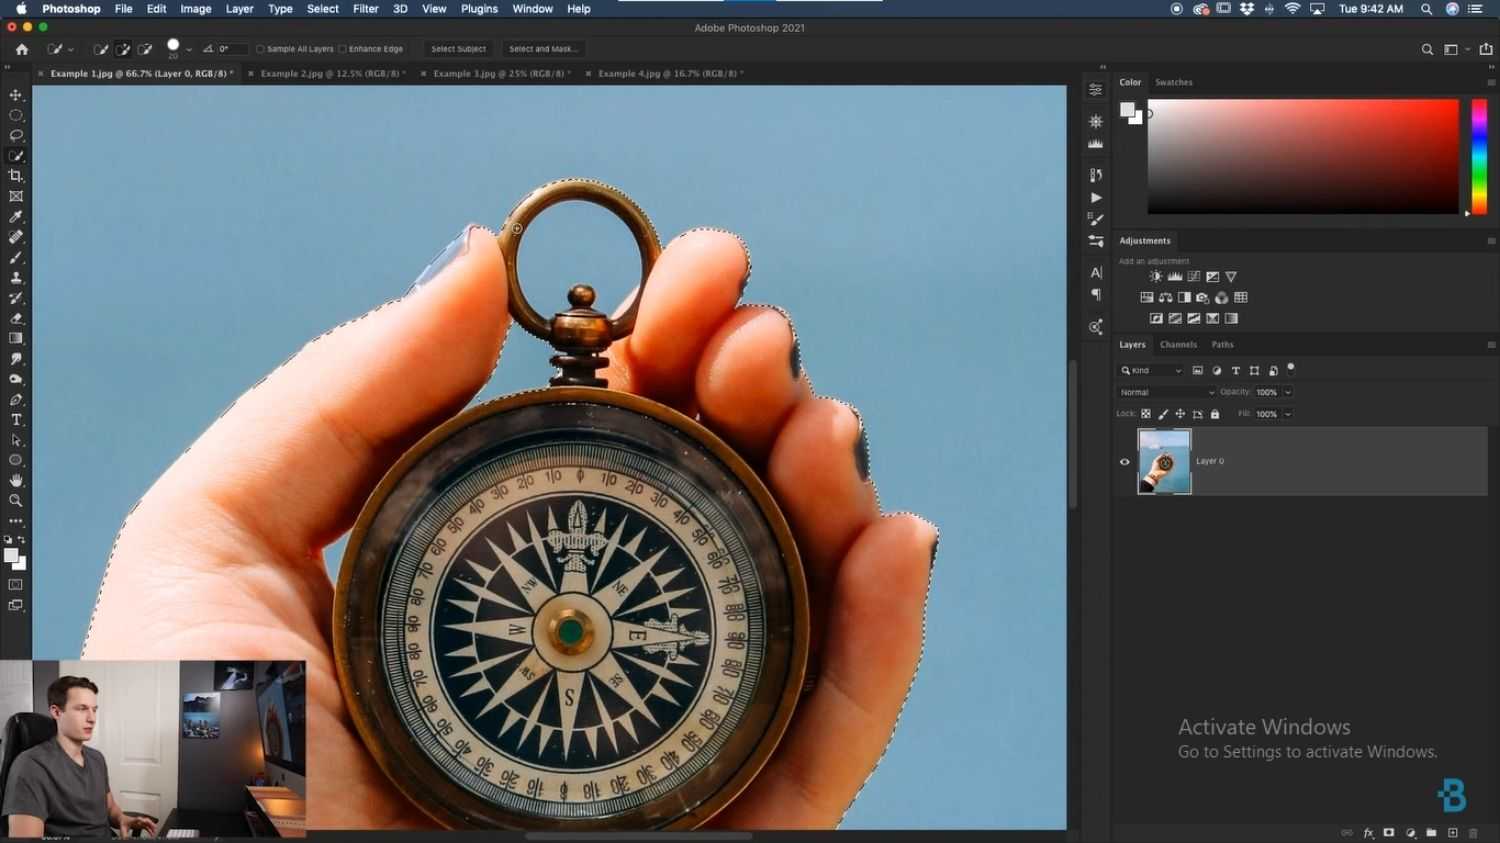
Some areas may have been left out or not properly selected. To fix these, use the Quick Selection tool to paint over the areas that need to be added to the selection.
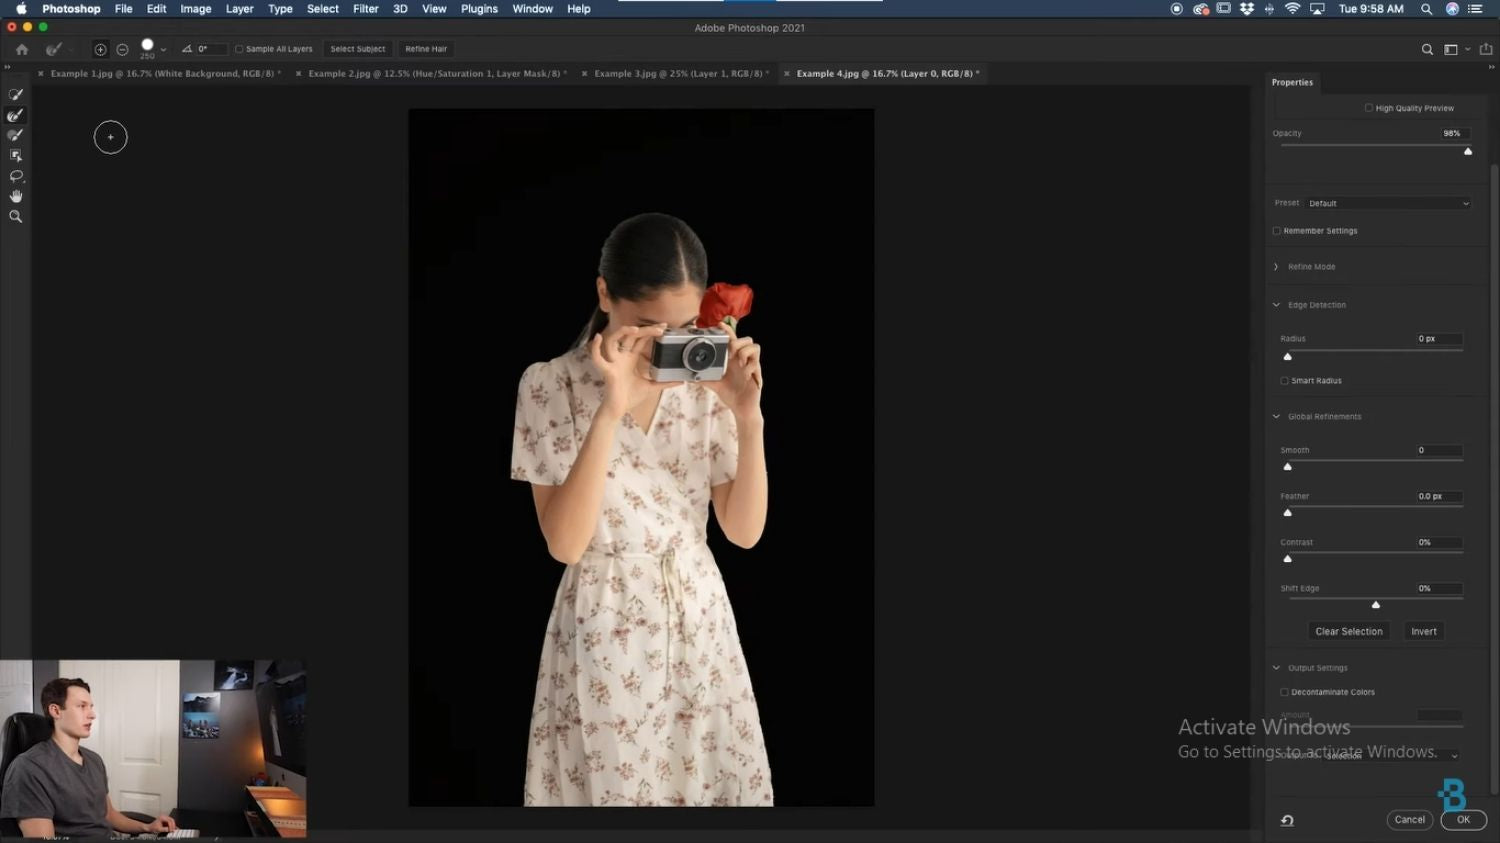
Step 4: Access the Select and Mask Option
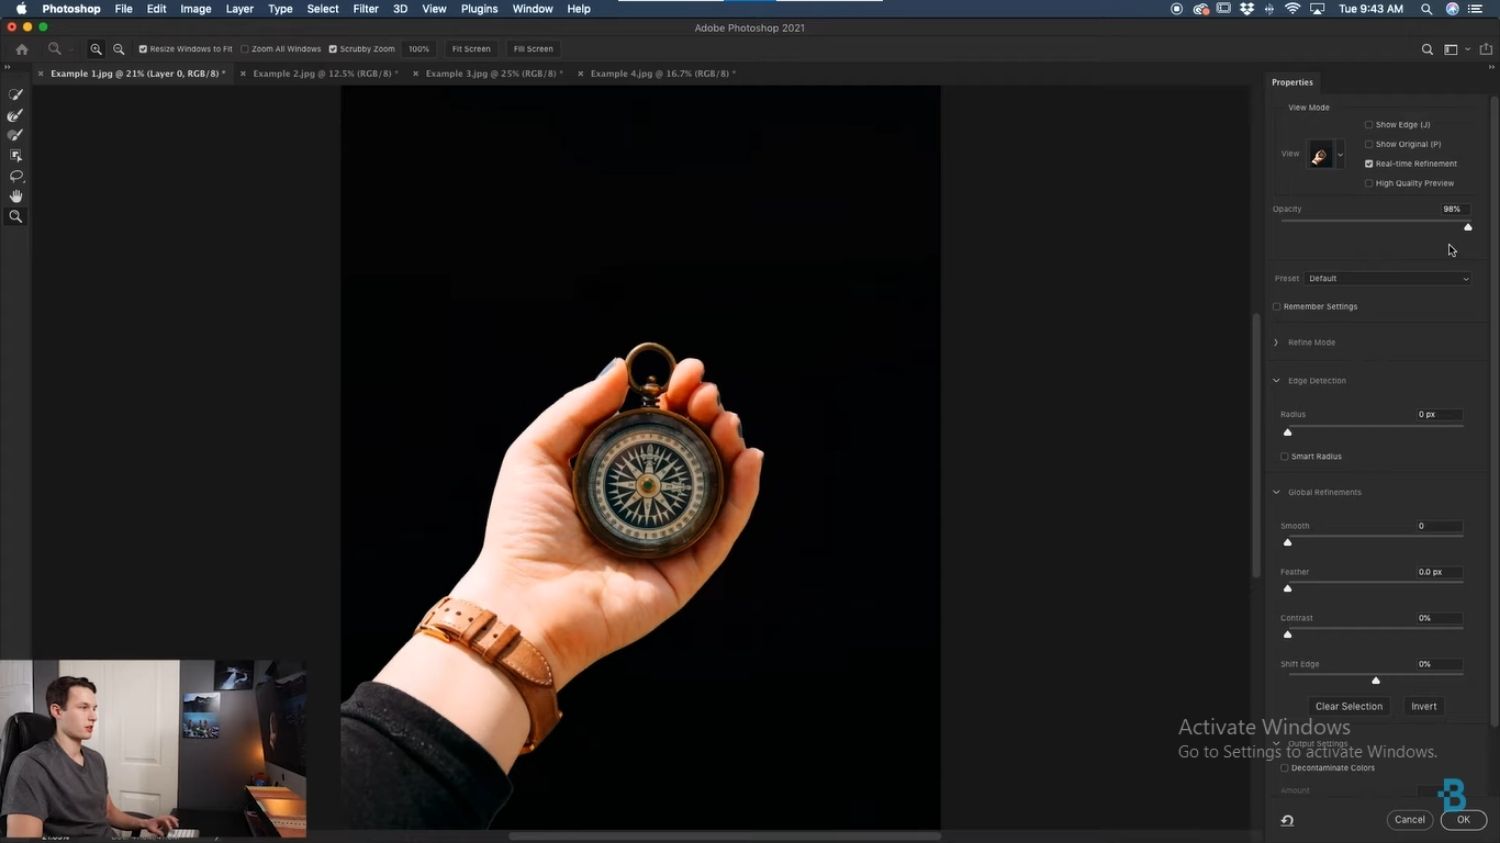
Once you have selected, go to the Select menu and choose Select and Mask. This option allows you to refine your selection even further.
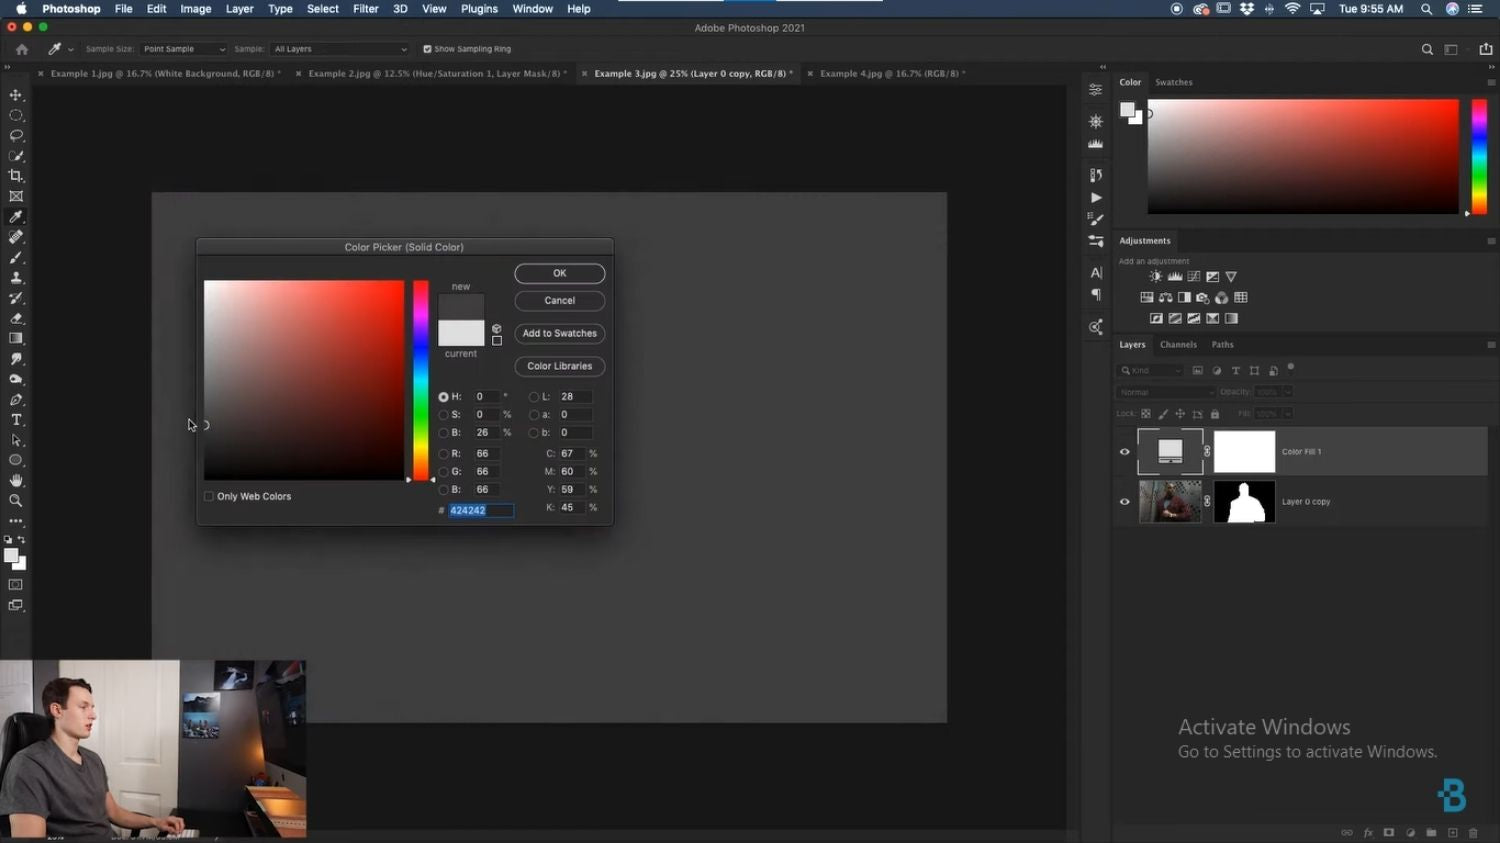
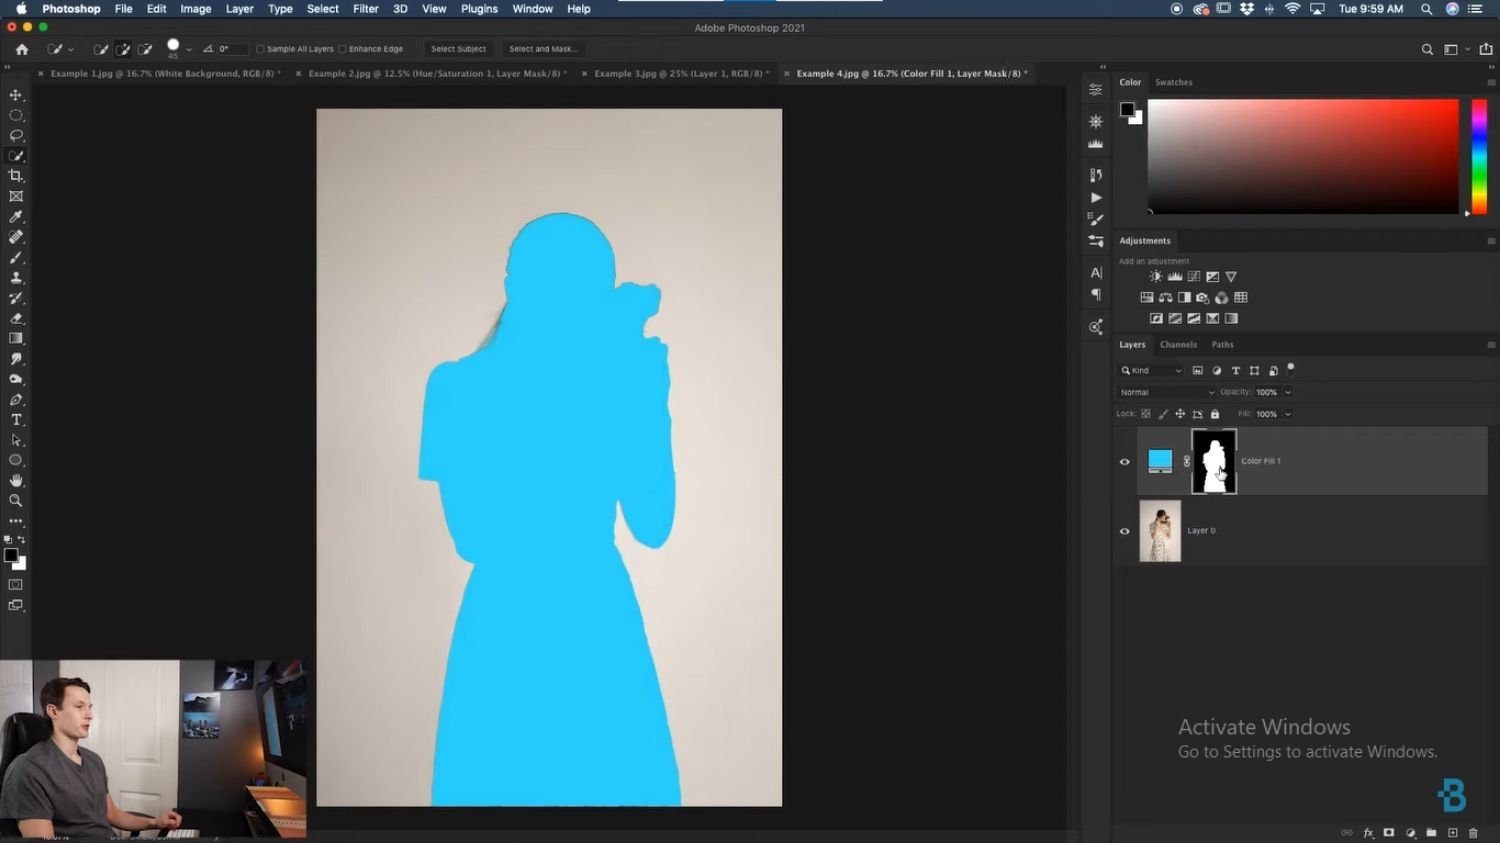
Step 5: Create a Color Fill Layer
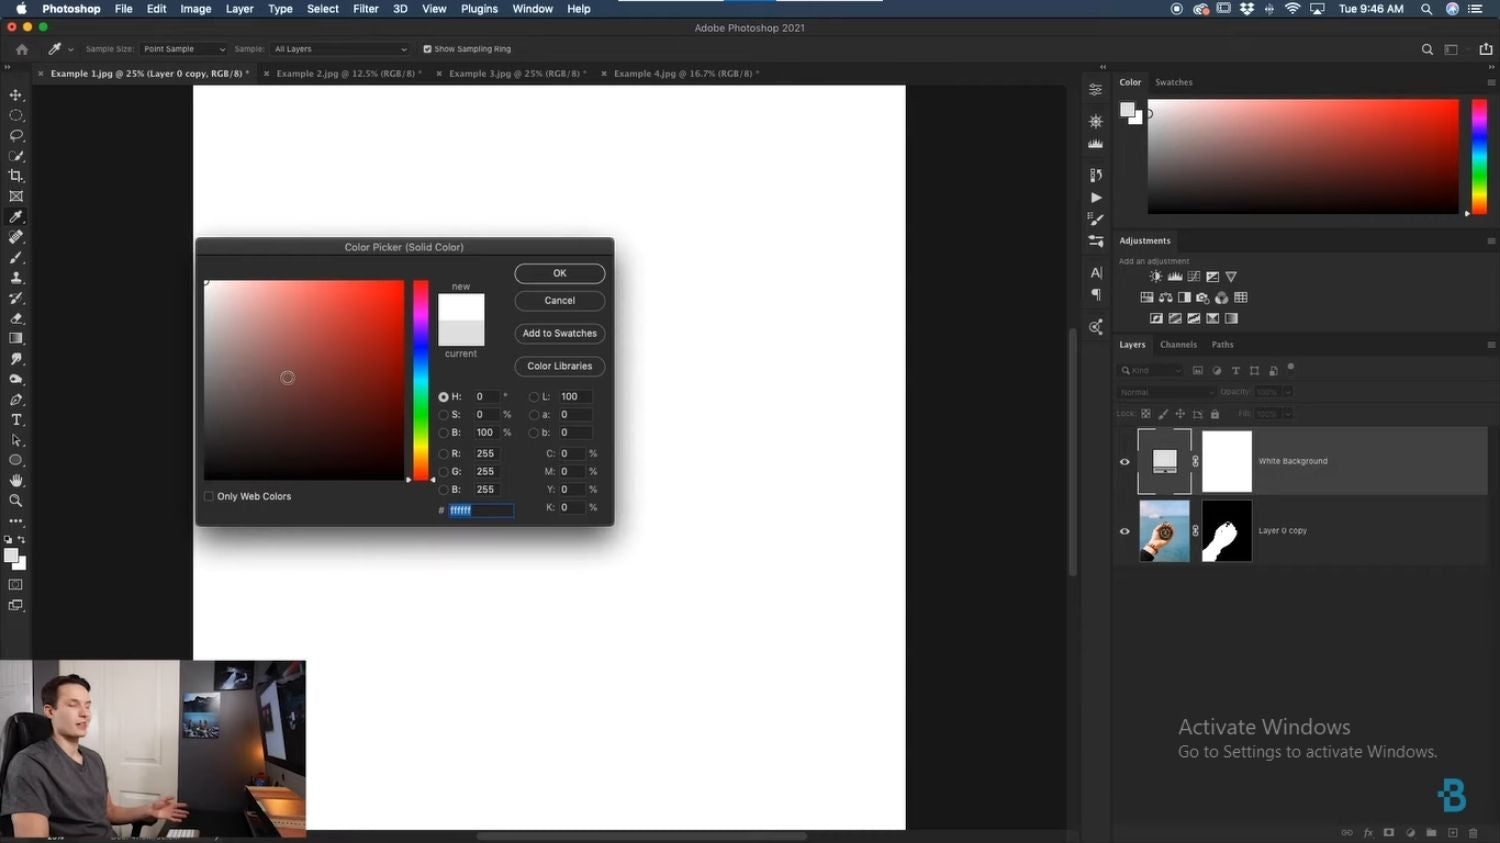
Create a new color fill layer by clicking the Create new fill or adjustment layer button at the bottom of the layers panel. Pick white as your color.
Method 2: Colorize White Backgrounds
Just like we have done with the first method, follow the same step1 to step 4 in Method 1.
Step 5: Apply the selection to an adjustment layer
Create a Hue/Saturation adjustment layer, and the selection will automatically apply to the mask. Then invert the layer mask.
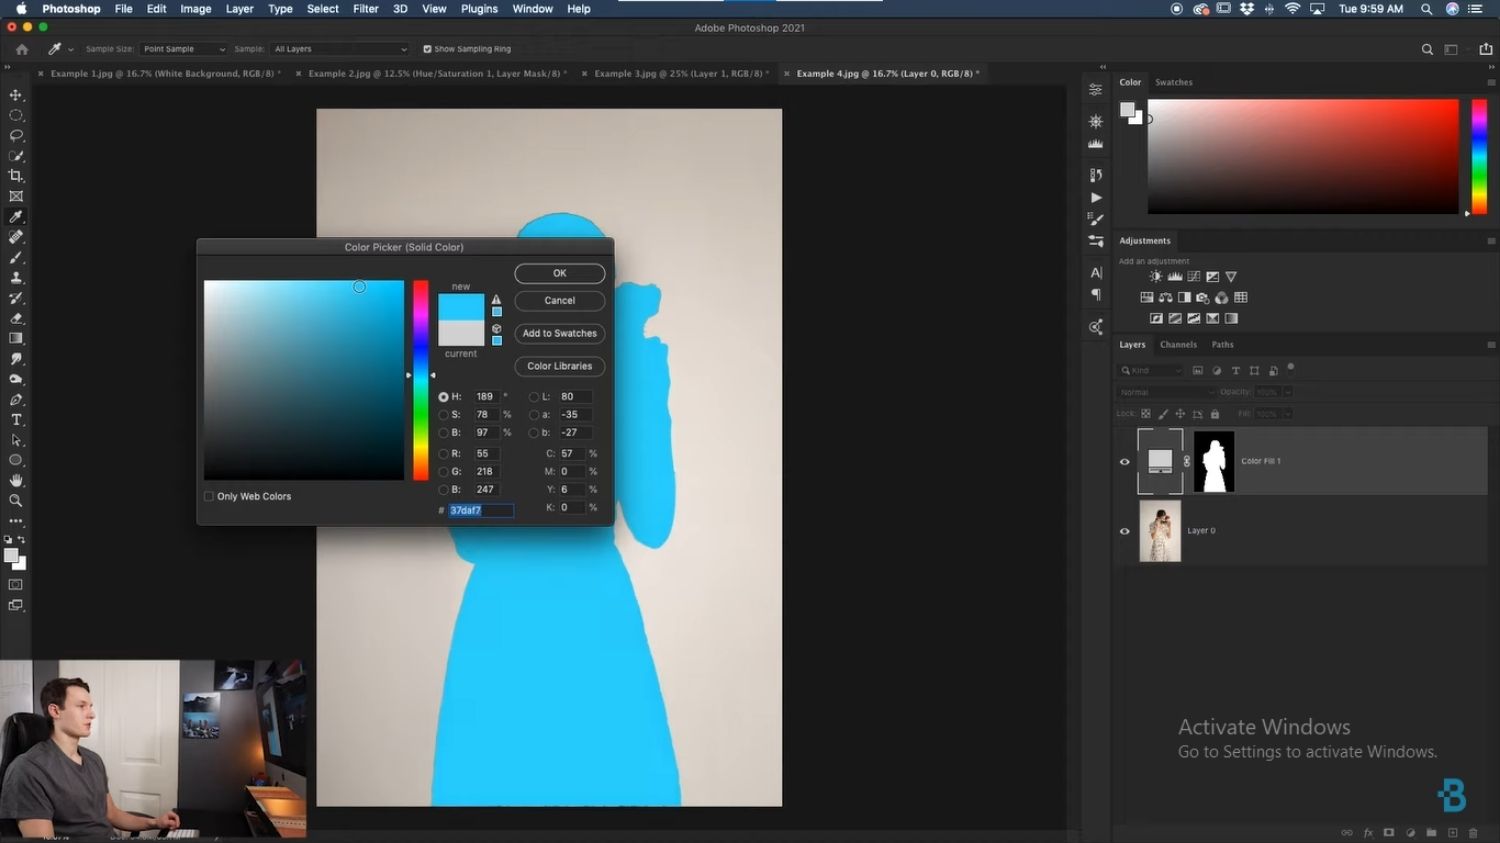
Step 6: Apply the color
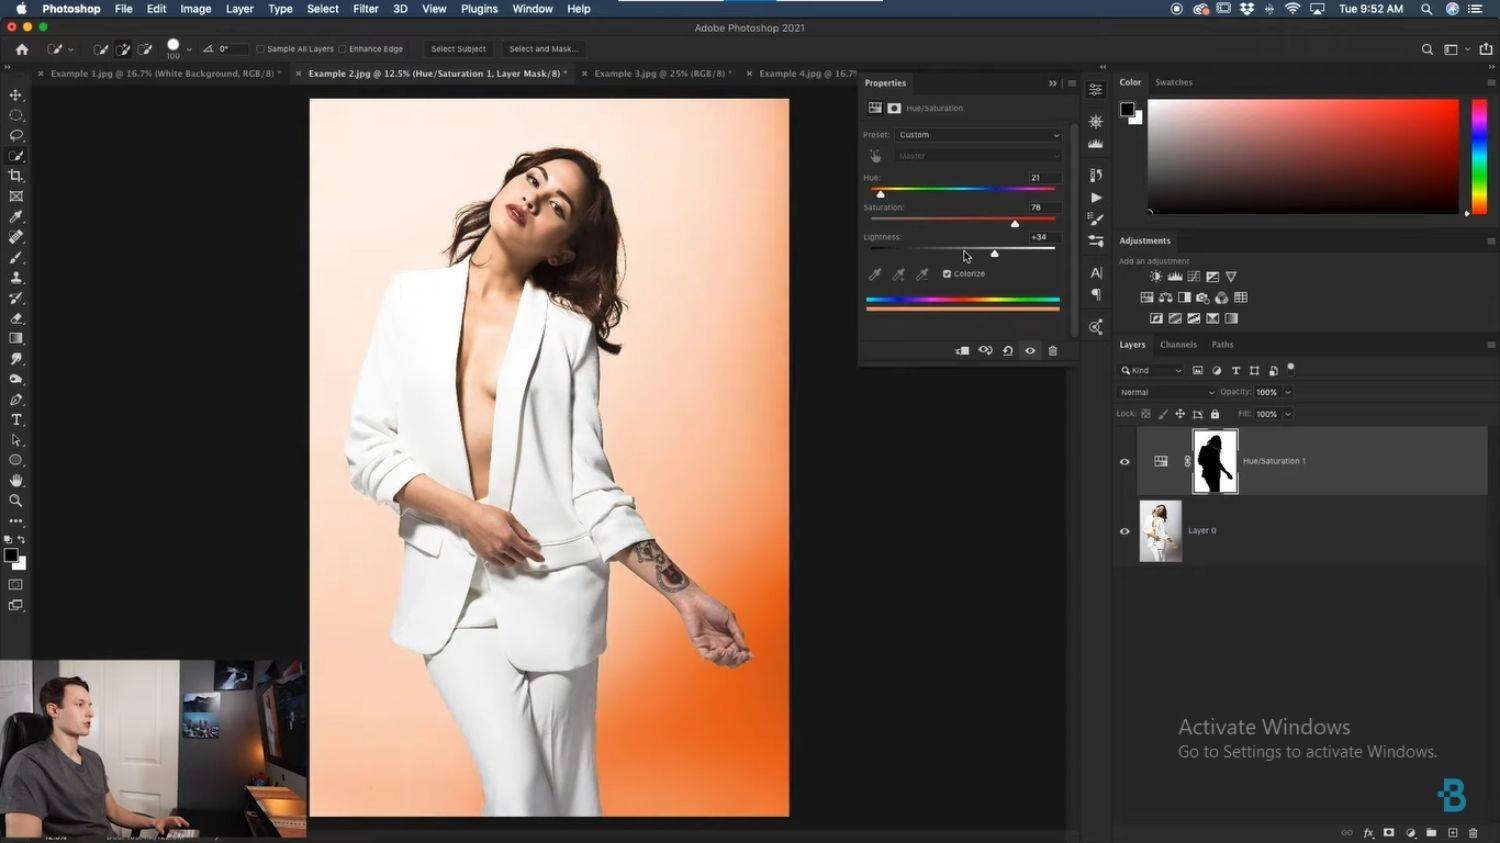
Click the Colorize option in the Hue/Saturation adjustment layer to apply a single hue across the selected area. Use the Hue, Saturation, and Lightness sliders to adjust the color as desired.
Method 3: Creating Gradient Backgrounds
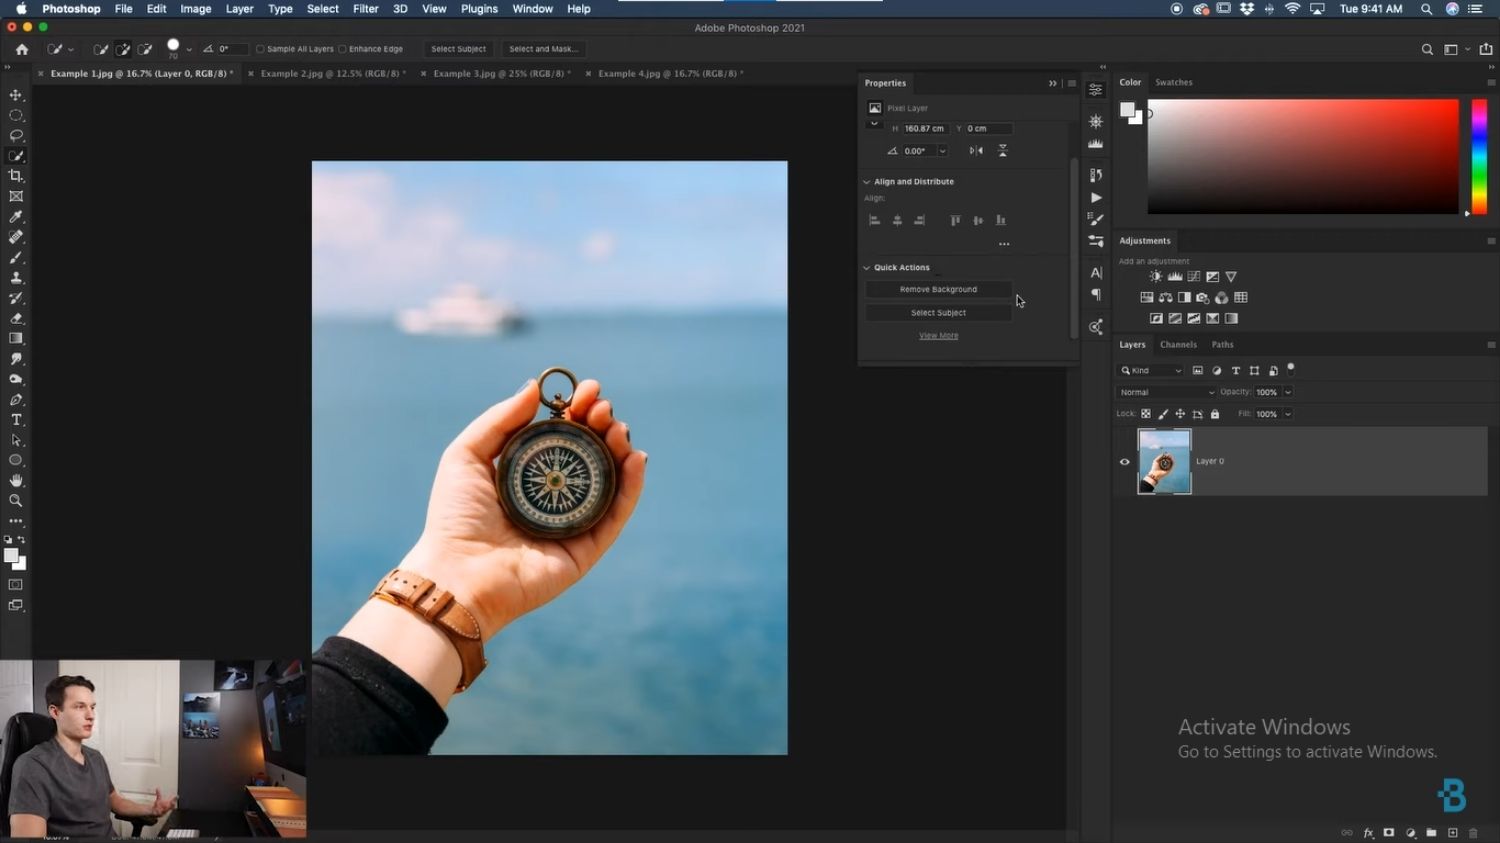
Step 1: Remove the Background
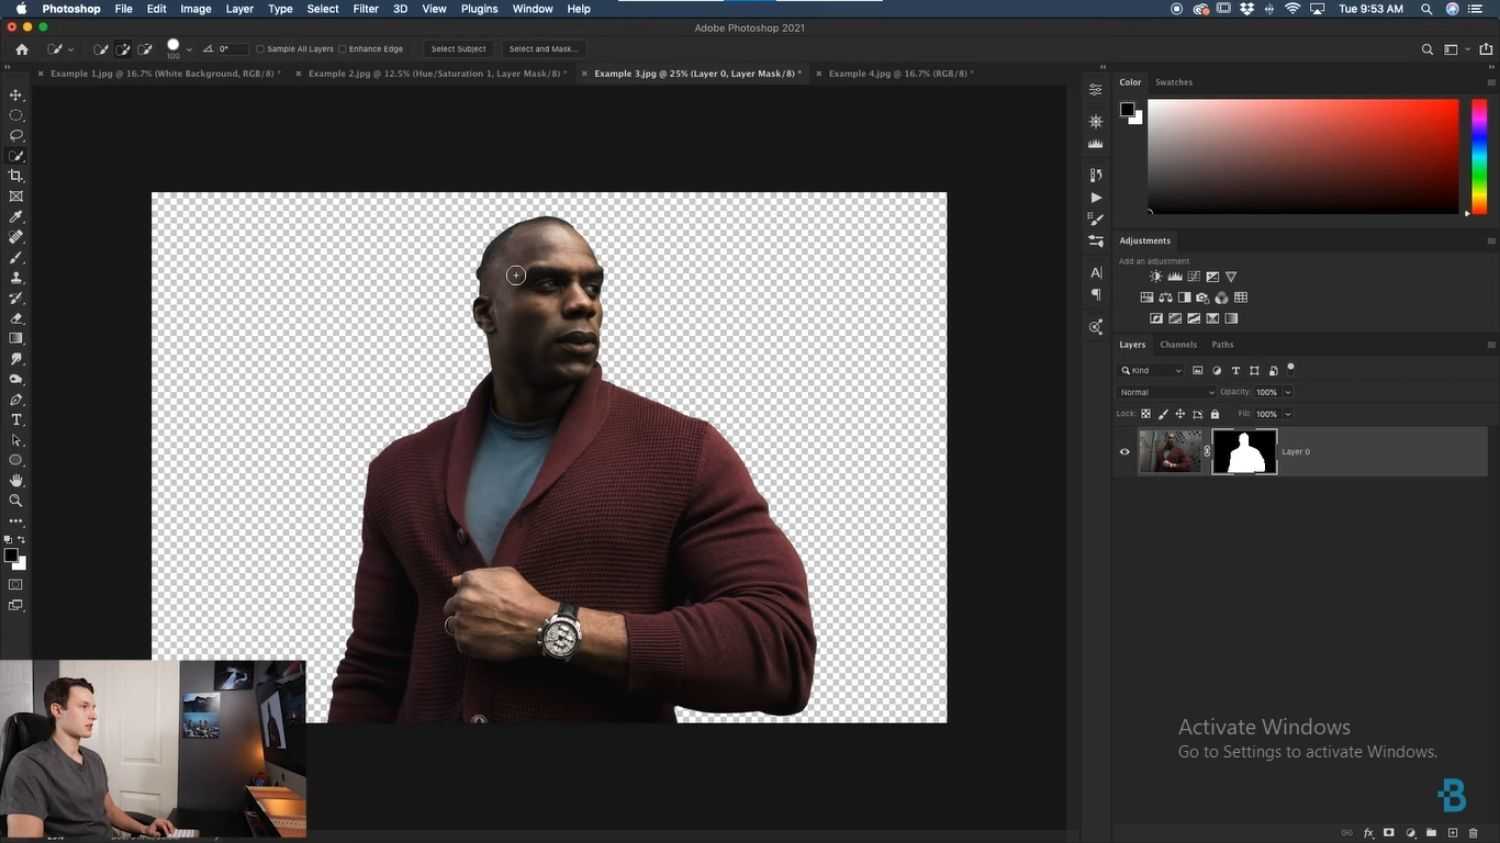
Start by unlocking and selecting the background layer. Then remove the background from our Image to create a selection. Click the Properties panel and select "Remove Background" instead of "Select Subject."
Step 2: Open Select and Mask Add a Solid Color Layer
Double-click on the layer mask to open the "Select and Mask" option then create a solid color layer.
Step 3: Create a Gradient Layer
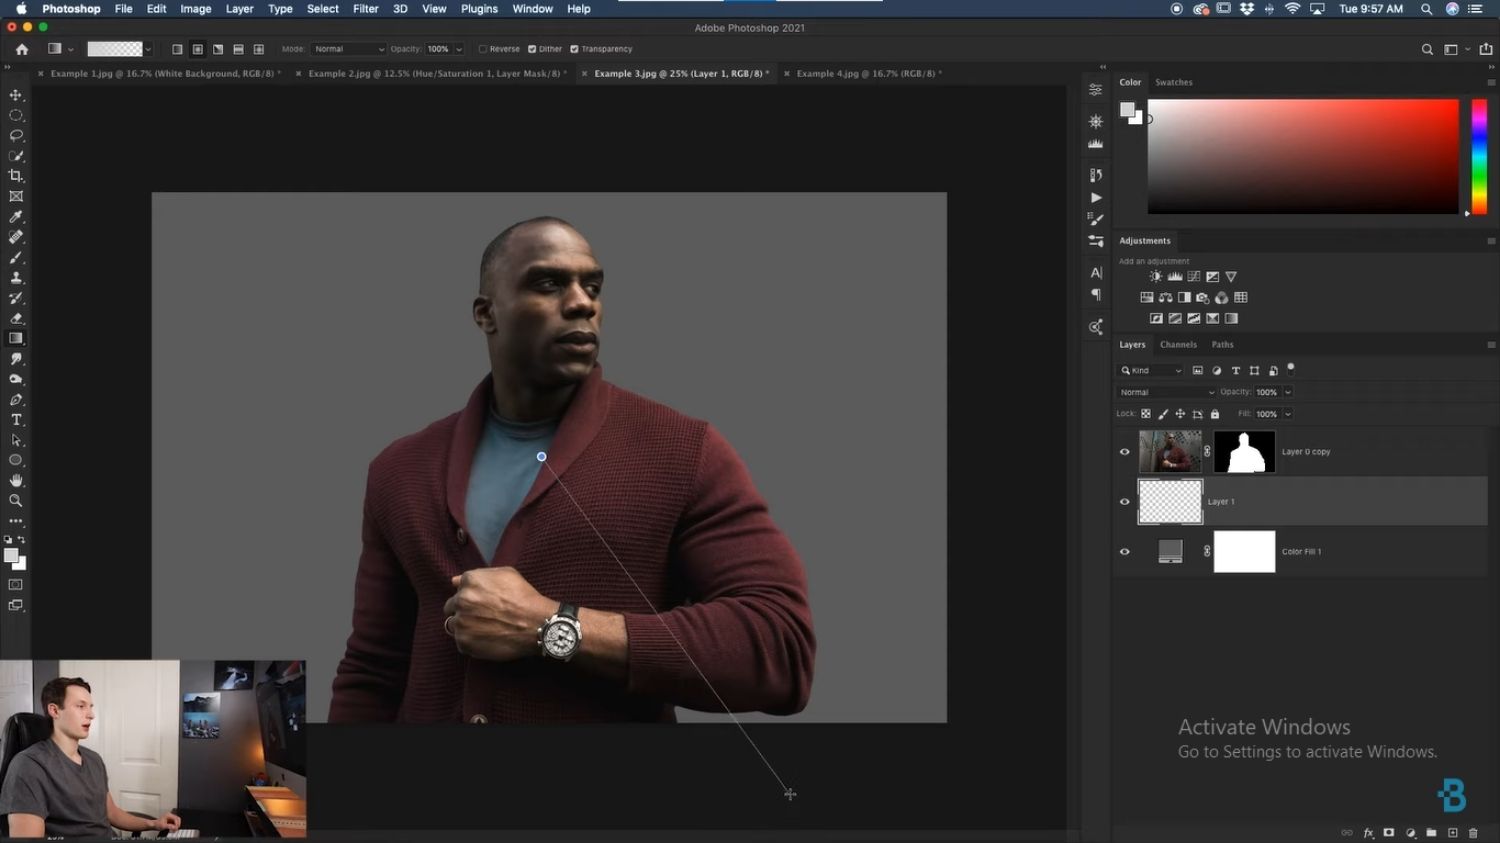
Create a new layer above your solid color layer but below your image layer. Select the gradient tool and choose the "foreground to transparent" gradient. Set your foreground color to the color you want your gradient to look, and select the radial gradient.
Method 4: Using Color Fills
Step 1: Select Your Subject and Refine the Selection
Start by selecting your Subject using the "Select Subject" tool. Next, go to "Select and Mask" because you want to work on the Subject or any other areas that need refining.
Step 2: Create a New Color Fill Layer
After refining the selection, output it to a selection, and create a new color fill layer by going to "Layer" and selecting "New Fill Layer" and then "Solid Color." Choose the color you want to use for your background.
Step 3: Invert the Color Fill Layer Mask
Once you have created the color fill layer, click on the layer mask and press Command or Control I to invert it.
Step 4: Change the Blending Mode
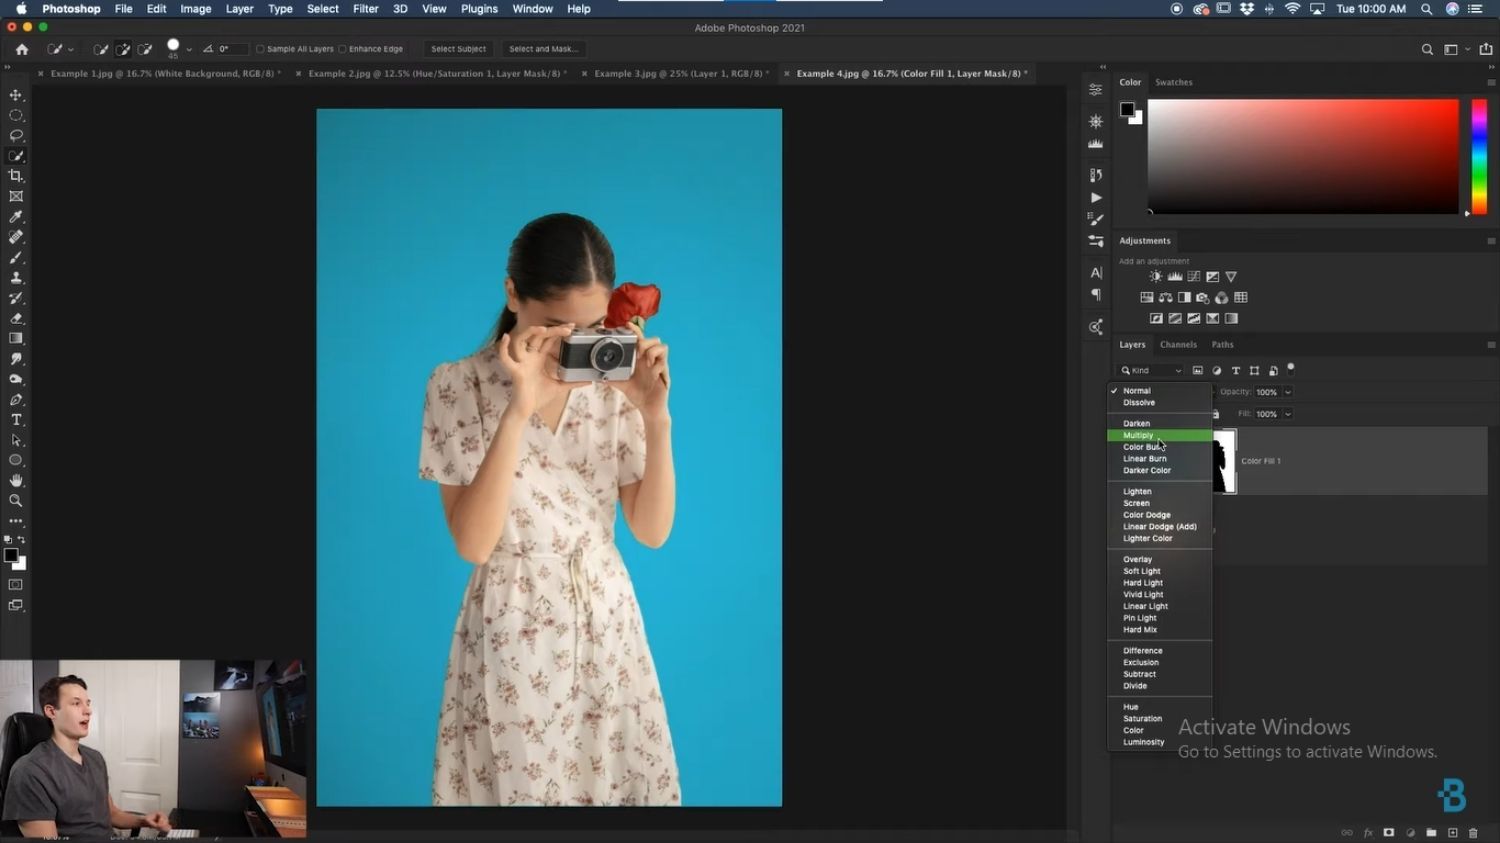
Image credit: youtube.com
To make the background look more realistic, change the blending mode from "Normal" to "Multiply."
Conclusion
Whether you are a beginner or a seasoned photographer, using Lightroom and Photoshop to make a white background is an essential skill that you can use to take your photos to the next level. In this tutorial, we have covered the basics of achieving this look. With the tips we have provided and a bit of practice, you'll be a white background pro in no time.
If you like this article, please share it! Be sure to join our FB Group: https://www.facebook.com/groups/Katebackdrops/ to share your ideas! You can also receive free articles, updates as well as discounts information from https://www.katebackdrop.com/ and our FB Group.