


 Christmas


✨ Build your dream setup!
×


How to Use Digital Backdrops - Digital Background Tutorial (Super Easy!) for Newborn Photography

Newborn photography is as sweet as it gets, but hey, it’s also one of the trickiest. Babies aren’t exactly known for following posing directions, sessions need to be quick (before the next diaper change or nap time meltdown) and setting up elaborate props can feel like a circus. That’s where digital backdrops come into your life as lifesavers.
Instead of filling your studio with endless blankets, baskets and themed props, you can simply photograph your little star on a cozy beanbag or blanket, then drop them into a gorgeous backdrop later with just a few clicks. And you know what the result will feel like? Like some super cool newborn portraits without stress or crazy expenses… worthy of any magazine cover starring your little one!
In this guide, we’ll walk you through everything you need to know about using digital backdrops: what they are, how to make them look totally believable and a few already-made options you can try today.
What is a digital backdrop?
First things first: the basics. A digital backdrop is basically a professionally designed background that you can blend with your photo in editing. Think of it as a creative shortcut where you can photograph your newborn safely snuggled up on a blanket. Then comes a little Photoshop magic. You can place them in a dreamy Christmas scene, a cute garden or even a sporty setup fit for a future MVP. And yep, all without ever moving them from their comfy spot.
These backdrops usually come as high resolution, so they’re super easy to work with in programs like Adobe, Illustrator, Photoshop, Affinity Photo and more.
If you want to skip the trial and jump straight into beautiful designs that are ready to use, you can go directly to Kate Backdrop’s collection of digital backdrops. A great collection of designs for newborns, holidays and themed shoots that make it just easy to find something perfect for your dream pics.
How To Make Digital Backgrounds Look Realistic
You may dislike the thought of editing, as it’s easy to think it might take hours and hours of time and stress. But trust me… It’s much easier than it seems. And we surely made it even easier with this step by step guide!
Once you follow this guide, you’ll be able to easily turn simple newborn shots into magical, professional portraits faster than you can even imagine.
Here’s how: take notes:
Step 1: Choose your Perfect Setting
Okay, let’s first select the backdrop that sets the vibe you want: a cozy Christmas scene, a soft floral setup, a minimalist look for timeless shots… you name it, you surely have it. This is indeed the funnest part, you get to be spoiled for choices and truly voyage with your imagination and creativity!

Step 2: Photograph your Tiny Model
Set your little newborn on a plain blanket or cozy mattress. Neutral shades like white, gray or beige work best. A simple background makes it much easier to separate your baby later and keeps all the focus where it belongs: on those tiny toes and chubby cheeks.
Also, pay attention to lighting: soft, diffused natural light (like from a window with soft curtains) will make blending much smoother.

Step 3: Import Your Photos into Editing Software
Open your baby’s photo and your chosen digital backdrop in your preferred photo editor. Place the backdrop on one layer and the baby’s photo on another, keeping them separate makes it easy to move, resize and adjust each piece.
Step 4: Separate the Baby from the Background
Now comes the fun part! Use tools like the pen tool, the subjection selection or the quick selection (backdrop remover) to carefully outline your little model and separate him or her, from the original background. Take your time zooming in to tidy up the edges, especially around tiny details like hair, fingers and toes, so your cutout looks clean and natural.
Little editing hack: add a slight feather to your selection as it softens those edges and helps your cutout blend smoothly into the backdrop, instead of looking like it was glued on.

Step 5: Blend the Layers Together
It’s magic time. Drag your cutout baby layer over the digital backdrop layer. Resize and position them so it looks natural. Pay attention to the size: make sure your little one doesn’t look like a giant next to the props, or tiny enough to get lost in them. The baby should feel naturally sized within the scene.

Step 6: Match the Colors and Tones
Voilà, you’ve got your edited photo. Now, to make the scene look realistic:
Adjust the basics: play with brightness, contrast and saturation until your baby photo and the backdrop feel like they belong in the same shot
Match the mood: use color grading or curves to tie the tones together, so nothing feels out of place.
Place the cutout naturally: add a little shadow under the baby. This is such a tiny detail that effortlessly enhances the the whole scene making it feel real.

Step 7: Add Final Touches
Once your baby is perfectly nestled into the backdrop… time for the finishing touches. Definitely no need for overdone editing here! Trust your intuition and make only the adjustments that preserve the natural feel of the image while enhancing its magic. Subtle edits go a long way, highlighting the beauty of your tiny model and turning a great photo into something truly magical
And there you have it: a professional newborn portrait using a digital backdrop, created safely and easily!
3 Digital Backdrops That Make Newborn Photos Easy, Stunning and Totally Magical
Here are three of our favorite digital backdrops that are sure to make your little star steal the show:
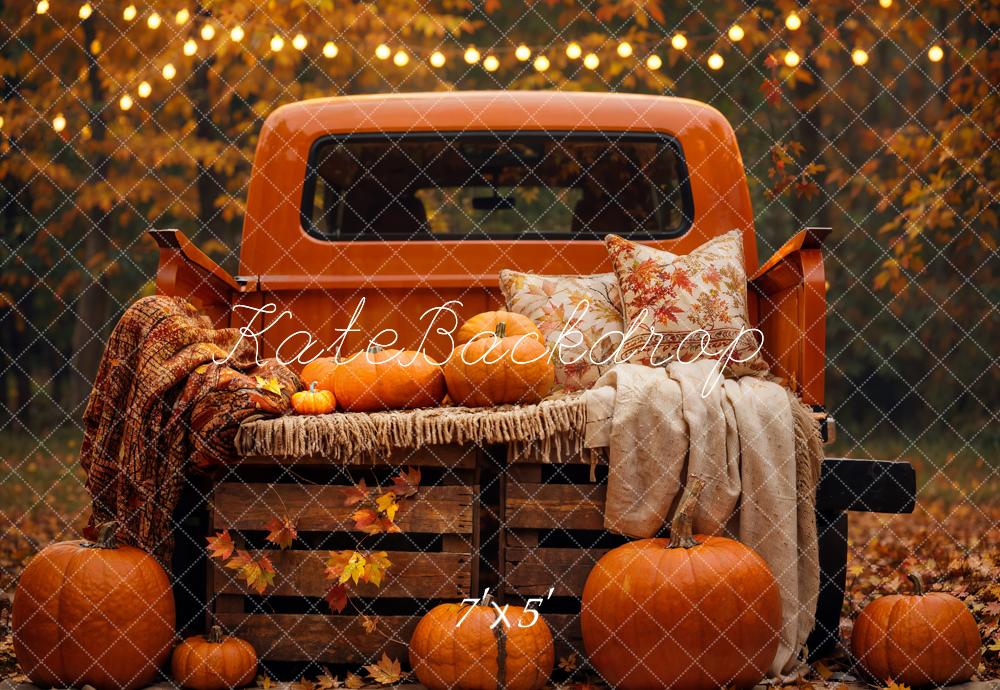
1. Christmas Time Digital Backdrop
What if you feel festive? This backdrop easily takes your newborn star in a Christmas scene…no freezing snow, no complicated props, just pure holiday magic. Perfect for creating memories that will make everyone “aww” for years to come!

🎄 Wrap your newborn’s first Christmas in festive magic ➜
2. Sport Digital Backdrop
Indeed the best choice for parents who are sports fans. Imagine a newborn peacefully napping while “posed” against a sporty themed background. And yes, definitely ideal, especially for little boys.

🏆 Kick off your baby’s first portraits with sporty charm ➜
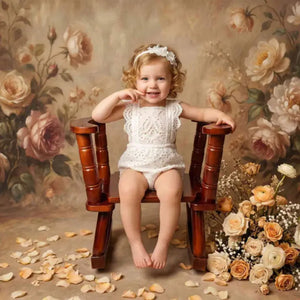
3. Floral Newborn Digital Backdrop
This backdrop offers a soft, whimsical floral arrangement that perfectly complements newborn portraits. It’s feminine, versatile, timeless and particularly popular for spring or boho-inspired shoots.

🌸 Wrap your newborn’s first moments in a floral dream ➜
Final Snuggles
Digital backdrops are a game-changer for newborn photographers. They save time and cut costs. But, most importantly, they allow you to create breathtaking, professional portraits safely and effortlessly.
By keeping things simple, you can create incredible results. Start by choosing the right backdrop, then photograph your tiny model on a clear, natural setup. Finally, blend the two images with precision. These simple three steps turn ordinary shots into works of art.
Kate’s collection of digital backdrops gives you endless ways to make every newborn photo a little work of art. Have a peek into it!


Weekly Picks 15%OFF
Save 15%


Save 15%

Save 15%

Save 15%


