Easter🐇


✨ Build your dream setup!
×


What is Color Grading | How to Use in Lightroom?

Color grading adds a whole new dimension to your photography. Most of the time, we see photographs without any enhancements. But when color grading is done, you can completely change the appearance of your image. You can make a portrait photo look like a shiny, slim, and polished magazine with color grading.
You can also make a photo look like it is from a movie, or if you want to make your images more like paintings, you can make them more surreal. Here is a blog about how to use Color Grading in Lightroom to enhance your photographs.
What is Color Grading?
Color grading in photography is the process of improving the appearance of an image by adjusting the colors to correct the overall tone. The process of color grading is often used in film, photography, and video production.
Color grading photoshop can be done in Photoshop by using the Hue/Saturation tool, the saturation tool, or the Curves tool.Changing these elements can make an image look brighter, darker, more vibrant, or more muted.

Photo by Setyaki Irham on Unsplash
Color grading is important because it can make an image or video look more aesthetically pleasing. It can also be used to correct color imbalances or to make an image look more natural.
Color grading can also create a certain mood or atmosphere in an image or video. For example, warm colors can create a cozy or inviting feeling, while cool colors can create a more calm and serene feeling.
Color Correction vs. Color Grading
What is Color Correction?
Color correction is a process in which the colors of an image are adjusted to achieve the desired effect. You can do this to correct errors in the color balance of the image or enhance the overall look of the image.
Color correction is often necessary when an image has been captured under poor lighting conditions, when the colors in an image are not accurate, or when an image needs to be adjusted to match the colors of another image.

Photo by Giuseppe Patriarchi on Unsplash
Color Correction vs. Color Grading
Color correction and color grading are two different processes used in video and photography. Both can enhance the colors in an image, but they are used for different purposes.
Color correction adjusts and helps balance the colors, making them appear as realistic as feasible. It fixes exposure, white balance, noise, contrast, and highlights. It primarily focuses on minor corrections.
Color grading comes after color correction. It changes the tone of a shot by manipulating the hue. Color grading focuses on levels, saturation, solid color fill, and curves.Colour grading is mostly utilized to realize a creative idea.
Step-by-Step Tutorial for Color Grading in Lightroom
On an Hazy Afternoon
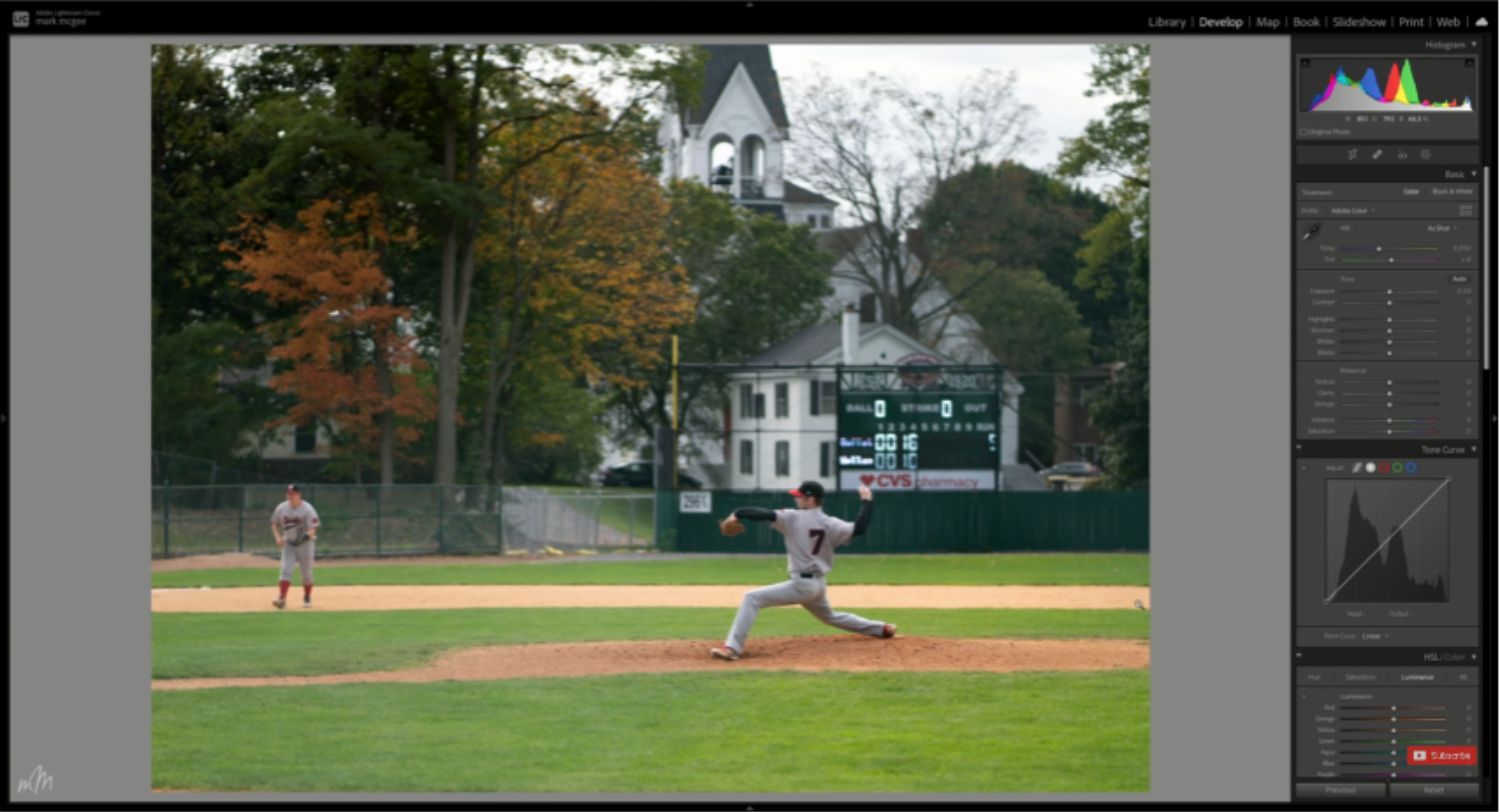
Step 1: Bring Down the Exposure
 Bringing down the exposure is the first step, and how much will depend on how dark your image is. A correctly exposed image works around a two-stop reduction.
Step 2: Desaturation of all colors
 Next, you will desaturate all the colors from the image because this technique tends towards over-saturating colors. You can bring back specific colors once exposed to where you need them.
Step 3: Turning on Highlight Clippers
 This will show you how far to push the white sliders.
Step 4: Dehazing
 On the basic sliders, dehaze upto around 25, then add a touch of clarity and some negative texture.
Step 5: Introducing Colors In a Controlled Way
 By introducing colors in a controlled way, you will determine the dark tone look. You will bring the reds down to negative, a little muted around negative 20. Orange will bring back the colors in the sand and skin tone in the picture. Yellow and green are colors that you're going to keep to a minimum when creating dark-tone images.
The foliage and the grass will look much better desaturated, so reduce them.Nothing much will happen with the equal so let it be at 0.Since in the image, some blues in the scoreboard increase the blues.
Step 6: Luminance of the Colors
You'll reduce the reds and oranges, especially in the sand. The sand will look moodier and darker.Acqua will bring up the number seven jersey, same with the blues and some purple. Increase them.
Step 7: Hues
Small adjustments will be made to the orange slider to bring more copper into the sand.

Step 8:Color Grading
This is an important feature of dark-tone images. Some blues in the shadows areas help to cool things down, and some warmer tones in the highlights.
 Add a Linear vignette gradient in the foreground and reduce exposure.
 In this picture, bringing out more detail in the tree will complement those autumnal oranges that are going on. Therefore increase the whites and the shadows.

On top of the trees, add some hazel and dreamy quality by decreasing dehaze and clarity, then increasing exposure.
 Step 9:Fading The Blacks
This can be achieved by putting a couple of control points on the tone curve and bringing up the image's very blackest parts. The control point helps maintain the control curve line and keep it straight.
 On a Sunny Day
 Step 1: Reducing the Exposure
 You will reduce the exposure again by two stops.
Step 2: Take Down All the Color
 Remove all the color from the image
Step 3: Turn on the Highlight clipping
 This will show you where to place the white sliders around plus 50 will be okay.
Step 4: Add a Moody Sky
 When adding a moody sky, you will increase the dehaze. Increase clarity upto 25. Reduce the blacks and the exposure too.
Step 5:Add a Gradient Filter
 Adding a gradient filter will introduce some more blacks by decreasing the blacks.
Step 6: Use a Radio Filter
 To bring some details to the fence, then use a radio filter. Bring back delta using the exposure and clarity by increasing them.
Step 7: Focus on the main point.
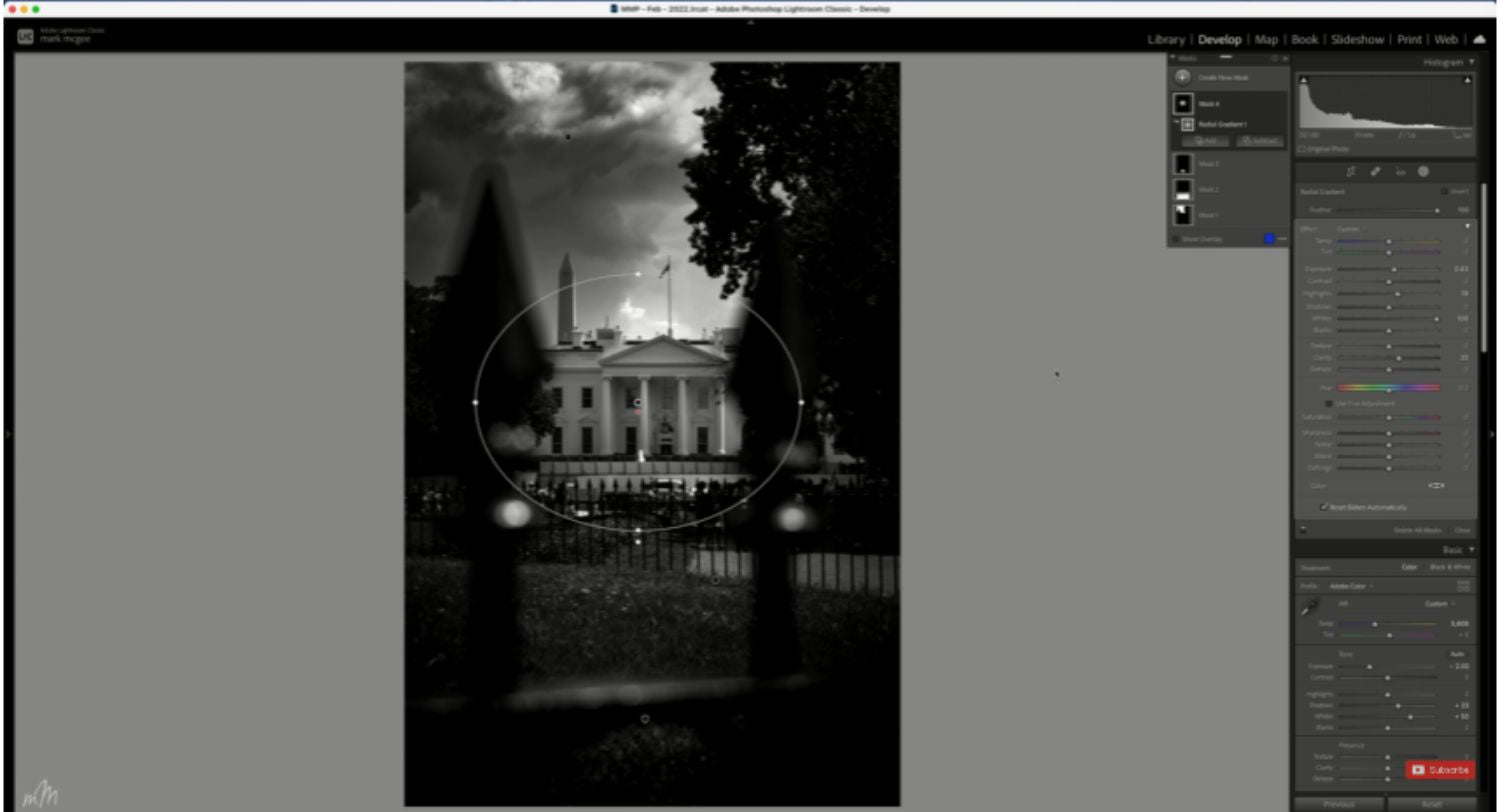 The white house is the main focus point, then add some exposure and bring up the white and a touch of clarity.
Step 8:Introduce Some Specific Colors
 Add some red in the poppy beds, adding a splash of color, and 85 will be okay.Orange on the footpath will work well. There is a touch of yellow in the grass; however, some are minimal with greens.
Use the blue slider to bring back color to the background gently.The luminance in the grass needs to come down.Change the hue of the yellow by increasing it.
Add a hint of blue in the shadow color grading. Reduce the luminance on the shadows and create that Gotham-style dark tone.
Conclusion
We hope you enjoyed our blog post about color grading Lightroom. We know that many people are confused about what color grading does and how it can be used. This blog aims to give a general overview of color grading so that you can better understand how it can be used effectively in your photos.
Image Credit: youtube.com